How to Choose Bathroom Fixtures

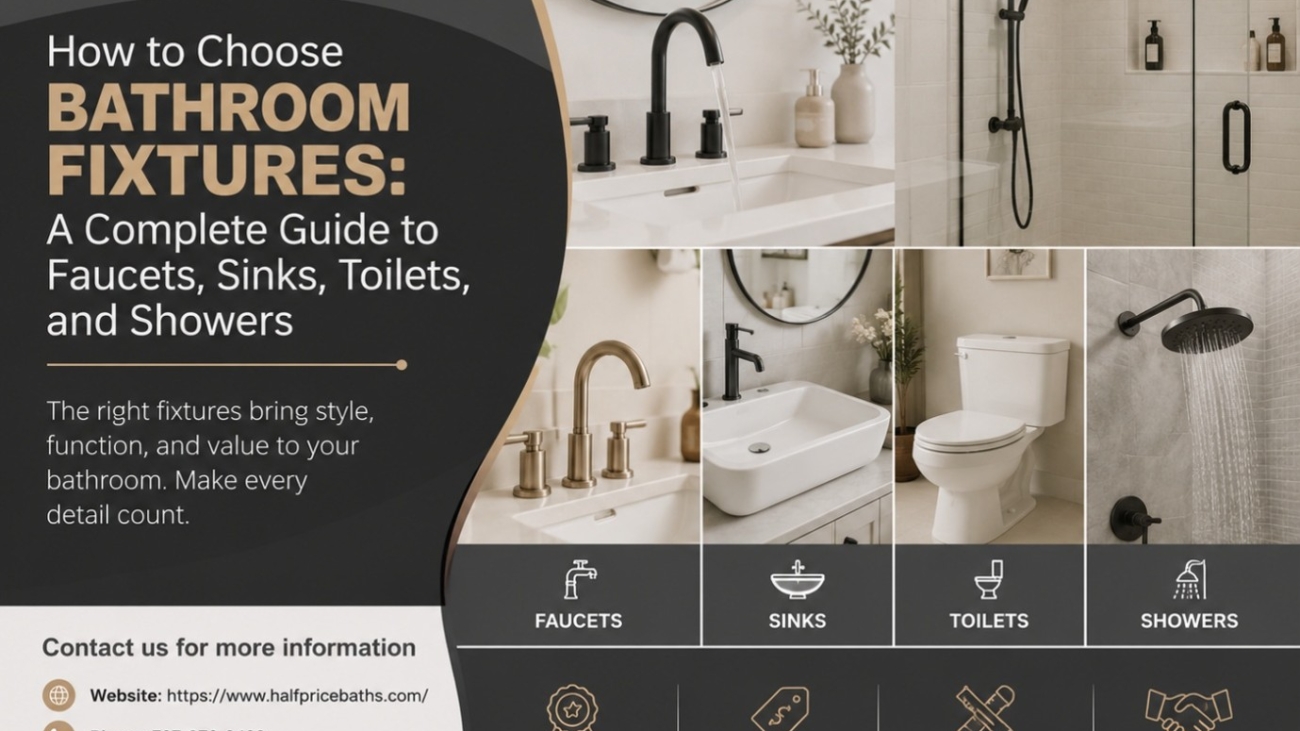
How to Choose Bathroom Fixtures: A Complete Guide to Faucets, Sinks, Toilets, and Showers

Summary: Choosing bathroom fixtures requires balancing style, quality, efficiency, and compatibility. This guide helps homeowners select faucets, sinks, toilets, and showers that match their needs and improve long-term comfort. It explains materials, smart features, installation factors, and professional remodeling benefits for creating a functional and beautiful bathroom.

Opting for bathroom fixtures sounds simple until you stand in a showroom and see hundreds of faucets, sinks, toilets, and shower options staring back at you. Many homeowners struggle to balance beauty, quality, budget, and long-term performance without making costly mistakes.

During Austin bathroom remodeling projects, we often see homeowners asking the same question: “How do I choose bathroom fixtures that will look great and work well for years?” The answer depends on understanding your space, lifestyle, water usage, and design goals.

How Do I Choose Bathroom Fixtures That Fit My Home?

The best bathroom fixtures are not only attractive. They should match your daily needs, bathroom layout, plumbing system, and maintenance expectations.

A good fixture choice brings together four key factors: durability, water efficiency, style, and compatibility. When these elements work together, your bathroom feels comfortable, functions smoothly, and adds value to your home.

Bathroom Fixture What to Consider

Best Choice For

Faucets Material, finish, water flow, durability Long-lasting style and easy maintenance
Sinks Size, mounting style, cleaning needs Better space use and visual appeal
Toilets Water use, comfort height, flushing power Efficiency and daily comfort
Showers Spray options, controls, safety features Relaxing and functional bathing experience

A beautiful fixture that does not suit your space can become frustrating over time. The goal is not just to buy something that looks good today. It is to choose something that continues to perform years later.

Start With Your Bathroom Style, But Do Not Ignore Function

Your bathroom should feel like a carefully designed space, not a collection of random products. Before choosing fixtures, think about the overall look you want.

Do you prefer a clean modern bathroom with simple lines? Or do you like a warmer traditional style with classic details?

Your fixture finish plays a major role in creating that feeling. Chrome offers a bright and timeless look. Brushed nickel hides fingerprints and water spots better. Matte black creates a bold, modern statement.

However, style should always work with practicality.

For example, a matte black faucet may look stunning, but it requires regular cleaning to maintain its appearance. A busy household may prefer a finish that is easier to maintain.

How to Choose the Right Bathroom Faucet Without Regret

The faucet is one of the most used fixtures in your bathroom. Small quality differences can make a big impact over time.

Look for faucets made from durable materials like solid brass. These fixtures usually handle daily use better than lower-quality alternatives.

Pay attention to:

  • Valve quality
  • Water flow rate
  • Finish durability
  • Handle comfort
  • Manufacturer warranty

A stylish faucet with poor internal parts can lead to leaks, repairs, and replacement costs.

Think of your faucet like the engine of your bathroom sink. The outside appearance matters, but what is inside determines how well it works.

Choosing a Sink: Beauty Meets Everyday Convenience

A sink should match both your design vision and your daily routine.

For smaller bathrooms, wall-mounted or compact sinks can create more open space. For larger bathrooms, double vanities with spacious countertops provide better storage and convenience.

Common sink styles include:

  • Undermount sinks for a seamless countertop appearance
  • Vessel sinks for a decorative statement
  • Drop-in sinks for easier installation and replacement

Consider cleaning habits too. A beautiful sink that collects water around edges may become difficult to maintain.

The right choice makes your morning routine smoother and keeps your bathroom looking fresh.

Toilets: The Fixture You Use Every Day Matters Most

Many homeowners focus heavily on faucets and showers but overlook the toilet. However, it is one of the most important bathroom investments.

A modern toilet should provide:

  • Strong flushing performance
  • Lower water consumption
  • Comfortable seating height
  • Easy cleaning features

Water-efficient toilets can reduce household water use without sacrificing performance. Look for models with WaterSense certification, which indicates improved water efficiency.

Comfort-height toilets are also becoming popular because they are easier to use, especially for older homeowners or anyone looking for improved accessibility.

A bathroom should work for your life today and support your needs in the future.

Shower Fixtures Can Transform Your Daily Routine

A shower is more than a place to get clean. It can become one of the most relaxing parts of your home.

When selecting shower fixtures, consider:

  • Handheld shower options
  • Rain shower heads
  • Temperature controls
  • Water pressure performance
  • Safety features

For homeowners planning a bathroom remodel Austin project, shower upgrades are often one of the biggest improvements.

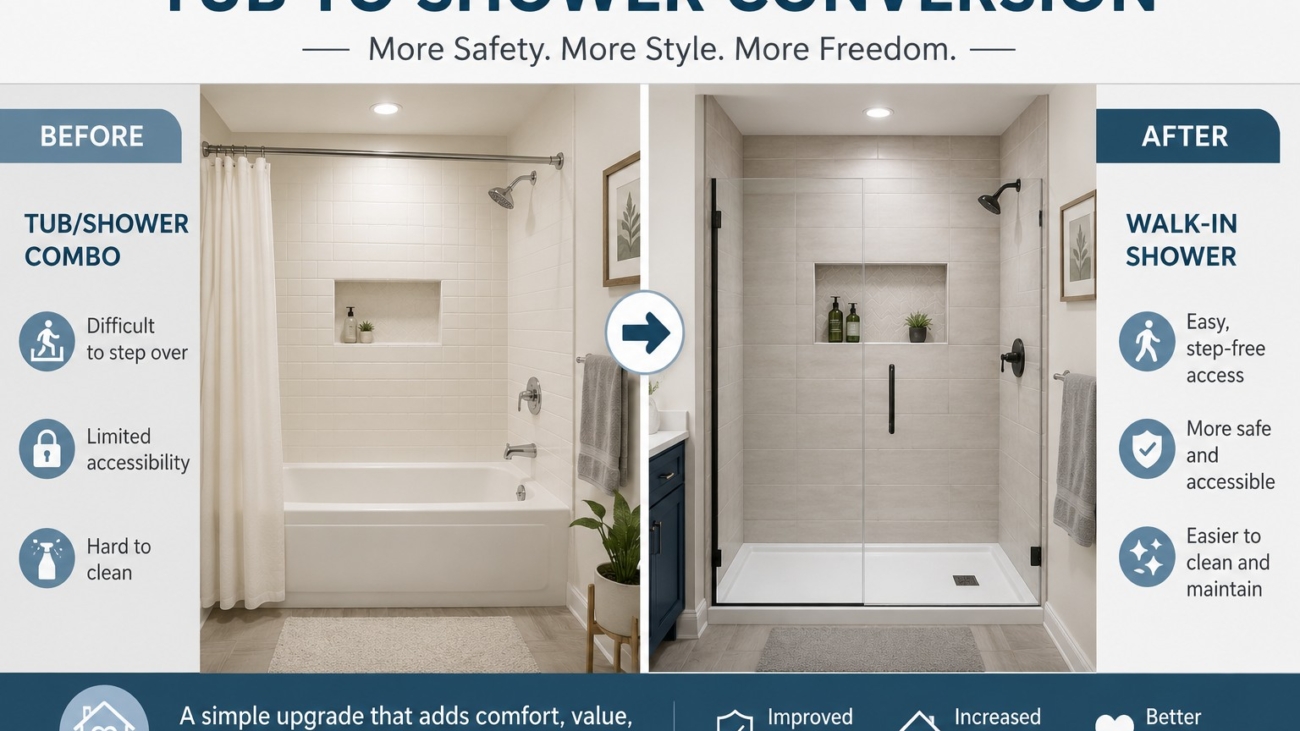
Many families are replacing outdated tubs with walk-in showers because they offer easier access, a cleaner appearance, and a more open bathroom design.

Quality and Compatibility: The Details That Prevent Future Problems

One common mistake homeowners make is choosing fixtures without checking compatibility.

A fixture must match your existing plumbing setup, water pressure, bathroom dimensions, and installation requirements.

Before purchasing, confirm:

  • Faucet hole spacing
  • Shower valve compatibility
  • Drain placement
  • Water pressure requirements
  • Available bathroom space

A professional remodeling team can help you avoid expensive surprises during installation.

This is especially valuable during a bath remodel Austin TX project where multiple elements, such as flooring, cabinetry, plumbing, and fixtures, must work together.

Should You Choose Smart Bathroom Fixtures?

Technology has changed bathroom design. Smart fixtures are no longer limited to luxury homes.

Options now include:

  • Touchless faucets
  • Smart toilets
  • Digital shower controls
  • LED mirrors
  • Heated toilet seats

These features can improve comfort, hygiene, and convenience.

However, smart features should solve a real problem. A technology upgrade is worthwhile when it improves your daily experience, not just because it looks impressive.

Why Professional Fixture Selection Makes Remodeling Easier

Choosing bathroom fixtures can feel overwhelming because every decision connects to another.

Your faucet affects your sink choice. Your shower design affects plumbing needs. Your fixture finishes influence cabinets, countertops, and lighting.

A professional design-build remodeling company helps you create a complete plan before installation begins.

With full-service bathroom remodeling, you can receive support from initial design and product selection through demolition, installation, and final completion. This approach reduces stress and creates a more consistent result.

Choose Fixtures That Make Your Bathroom Better Every Day

The right bathroom fixtures combine comfort, durability, efficiency, and style. Do not choose products only because they look attractive in a showroom. Choose fixtures that fit your home, your habits, and your long-term plans.

A well-designed bathroom should feel effortless. Every handle, faucet, shower control, and surface should work together to create a space you enjoy using.

At Half Price Baths LLC, we help homeowners create beautiful, practical bathrooms with thoughtful fixture selection, quality installation, and remodeling guidance from start to finish. Connect with us via – info@halfpricebaths.com or give us a quick call at – 737-370-9402!

Frequently Asked Questions

1. What should I consider before buying bathroom fixtures?

Consider durability, water efficiency, style, maintenance needs, plumbing compatibility, and how the fixtures support your daily bathroom routine.

2. Which bathroom fixture finishes are easiest to maintain?

Brushed nickel and chrome are popular because they resist visible marks and match many bathroom styles.

3. Are water-efficient bathroom fixtures worth buying?

Yes. Water-efficient toilets and faucets reduce water usage while helping lower utility costs without reducing performance.

4. Should all bathroom fixtures have the same finish?

Not always. Matching finishes create a balanced look, but mixing finishes carefully can add character and visual interest.

5. When should I replace bathroom fixtures during remodeling?

Replace fixtures during a remodel if they are outdated, damaged, inefficient, or no longer match your bathroom design goals.
Deck Mount Tub Fillers

Best Materials and Finishes for Deck Mount Tub Fillers: Chrome, Brass, Nickel, and Matte Black Compared!

Summary: Choosing the right deck mount tub filler finish improves bathroom durability, style, and long-term value. This guide compares chrome, brass, nickel, and matte black finishes, explaining maintenance needs, design compatibility, and material benefits.Homeowners can make confident fixture decisions that support a beautiful, functional bathroom remodel.

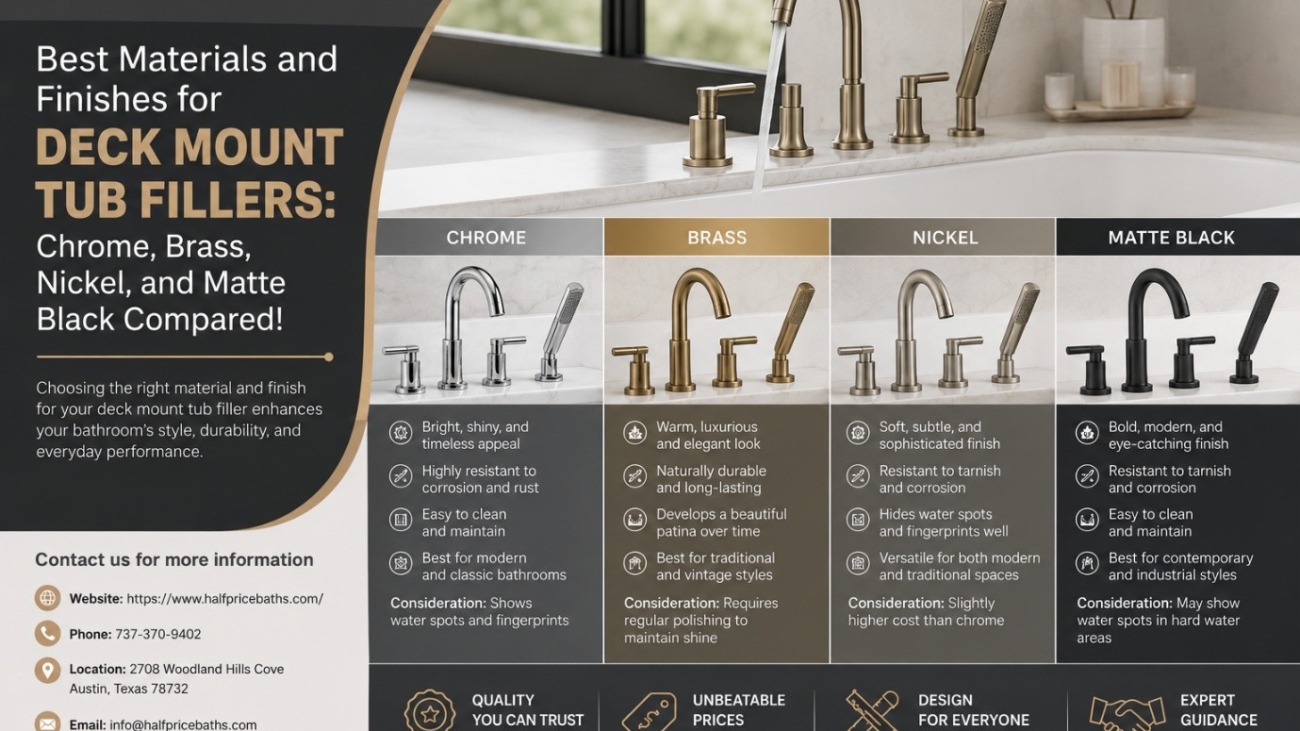
Let’s start with a quick comparison – Chrome offers a clean, budget-friendly shine, brass brings timeless warmth and strength, nickel creates a softer luxury look, and matte black adds modern character. The right finish depends on your bathroom style, cleaning habits, durability needs, and how long you want your fixture to maintain its beauty.

Choosing the right tub filler is not only about appearance. During a bathroom remodel, homeowners often ask which finish will last, resist corrosion, and still look beautiful years later. A well-planned deck mount tub filler installation can transform your bathing space when the material and finish match your lifestyle.

Which Deck Mount Tub Filler Finish Gives You the Best Long-Term Value?

A deck mount tub filler sits in a highly visible area of your bathroom. Unlike small accessories, it becomes part of the room’s design statement. The finish you choose affects maintenance, durability, cleaning, and the overall feel of your space.

A beautiful faucet that loses its shine quickly can become frustrating. That is why choosing the right material before installation matters. The goal is simple: select a finish that looks great today and continues performing years from now.

Chrome, Brass, Nickel, or Matte Black? See How They Compare

Each finish has its own strengths. Some homeowners prefer a bright spa-like appearance, while others want a warmer or more dramatic design. Here is a quick comparison to help you decide.

Finish

Appearance Durability & Maintenance

Best For

Chrome Bright, reflective, classic look Easy to clean but may show water spots Traditional and modern bathrooms
Brass Warm, elegant, timeless appearance Highly durable with proper care Luxury, vintage, and transitional designs
Brushed Nickel Soft, satin finish with subtle warmth Hides fingerprints and water marks well Busy family bathrooms
Matte Black Bold, modern, statement-making style Requires gentle cleaning to maintain finish Contemporary bathroom designs

Chrome Tub Fillers: The Reliable Classic That Fits Almost Anywhere

Chrome remains one of the most popular bathroom finishes because it works with almost every design style. Its reflective surface creates a fresh, polished appearance and pairs easily with white tubs, marble surfaces, and modern tiles.

The main advantage of chrome is affordability and availability. If you want a stylish upgrade without stretching your remodeling budget, chrome provides excellent visual impact.

However, chrome does require regular wiping because water spots and fingerprints can appear more easily. A quick cleaning routine keeps it looking bright and new.

For homeowners planning a bathroom refresh, chrome is often the safe choice because it blends beauty, function, and value.

Brass Tub Fillers: A Strong Finish With Timeless Personality

Brass has made a major comeback in bathroom design. Its warm golden tones create a comfortable, high-end feel without making the space feel cold or overly modern.

Solid brass construction is known for strength and corrosion resistance. This makes it a smart choice for homeowners who want a fixture built for long-term use.

Brass works especially well with natural stone, wood cabinetry, and handcrafted design elements. It adds personality to bathrooms that need a little more character.

Keep in mind that brass finishes vary. Some are polished and shiny, while others develop a natural aged look over time. Understanding the finish type helps you choose the right style for your home.

Brushed Nickel: The Practical Choice for Everyday Living

Many homeowners choose brushed nickel because it offers a balance between elegance and easy maintenance. Its soft appearance creates a calm, comfortable bathroom atmosphere.

Unlike highly reflective finishes, brushed nickel hides water marks and fingerprints better. This makes it a practical option for families who want less daily cleaning.

A freestanding tub deck mount design with brushed nickel fixtures can create a spa-inspired look while remaining warm and inviting.

This finish pairs beautifully with neutral colors, natural textures, and transitional bathroom designs. It is a great choice when you want something stylish but not overly trendy.

Matte Black Tub Fillers: Modern Style With a Bold Touch

Matte black has become a favorite in contemporary bathroom remodeling because it creates contrast and visual interest. A black tub filler can turn a simple bathtub area into a striking design feature.

This finish works well with white tubs, light countertops, wood tones, and minimalist layouts. It gives bathrooms a clean architectural feel.

The trade-off is maintenance. Matte black finishes should be cleaned with gentle products because harsh chemicals can damage the coating over time.

When cared for properly, matte black delivers a sophisticated look that feels current and intentional.

How Should You Choose the Right Finish for Your Bathroom Remodel?

Start with your overall bathroom design. Look at your cabinet hardware, shower fixtures, lighting, and countertop materials. Your tub filler should feel like part of the same design story.

Think about your daily routine too. A busy household may benefit from a finish that hides fingerprints and water spots. A guest bathroom may allow you to choose a more decorative option.

Your budget also plays a role. A successful remodel is not about choosing the most expensive product. It is about choosing the right product that delivers lasting value.

During a complete renovation, professionals can help coordinate these choices with your flooring, shower design, cabinetry, and other finishes.

Does Material Quality Matter More Than Finish Style?

Yes. The outer finish creates the visual appeal, but the internal construction determines performance. A high-quality tub filler made with durable materials can provide better reliability and fewer problems over time.

For example, a well-built freestanding tub with deck mount fixtures can become a long-lasting centerpiece when paired with quality plumbing components and professional installation.

The finish should never be chosen alone. Material quality, installation method, water conditions, and maintenance habits all affect the final result.

Why Professional Installation Makes a Difference

Even the best fixture can underperform if installation is rushed or incorrect. Proper alignment, secure connections, and careful waterproofing protect your investment.

A professional remodeling team looks at the entire bathroom, not just one fixture. They consider layout, plumbing access, design flow, and how each element works together.

From bath-to-shower conversions and groutless showers to custom cabinetry, countertops, flooring, and full kitchen remodels, a design-build approach creates a smoother experience from start to finish.

Upgrade Your Bathroom With Choices That Feel Right for Your Home

The best deck mount tub filler finish is the one that matches your style, supports your daily needs, and keeps its appearance over time. Chrome, brass, nickel, and matte black each offer unique benefits.

When you plan your bathroom renovation carefully, every detail contributes to a space that feels comfortable, functional, and beautifully designed.

At Half Price Baths LLC, we help homeowners create stress-free bathroom transformations with thoughtful design, expert installation, and complete remodeling support from consultation to completion. You can surely call at – 737-370-9402, or even drop us a mail at – info@halfpricebaths.com and we will get back to you at the earliest.

Frequently Asked Questions

1. Which deck mount tub filler finish is easiest to maintain?

Brushed nickel is usually easiest because it hides fingerprints and water marks better than highly polished finishes like chrome.

2. Is brass better than chrome for bathroom fixtures?

Brass offers excellent durability and a warmer appearance, while chrome provides affordability and a classic polished look.

3. Does matte black fade over time?

Quality matte black finishes can last for years when cleaned properly and protected from harsh chemicals.

4. Can I mix different bathroom fixture finishes?

Yes. Mixing finishes can create a custom designer look when the combinations are intentional and balanced.

5. Should I choose a tub filler before remodeling begins?

Yes. Selecting fixtures early helps your remodeling team plan plumbing placement, design details, and installation requirements properly.


Walk-In Shower vs. Walk-In Tub

Walk-In Shower vs. Walk-In Tub: Which Is Right for Aging in Place?

Summary: When comparing a walk-in shower vs. walk-in tub for aging in place, the right choice depends on mobility needs, bathroom space, budget, and future accessibility goals. This guide explains the safety, cost, maintenance, and usability differences between both options. Homeowners can make an informed decision by understanding which solution offers the best comfort, independence, and long-term value.

Choosing the right bathing solution is an important decision for homeowners who want to make their bathroom safer, more comfortable, and easier to use as they age. When comparing walk in shower vs tub, there is no single answer that works for everyone. The better option depends on your mobility level, whether you need caregiver assistance, your bathroom space, your budget, and how your needs may change in the future.

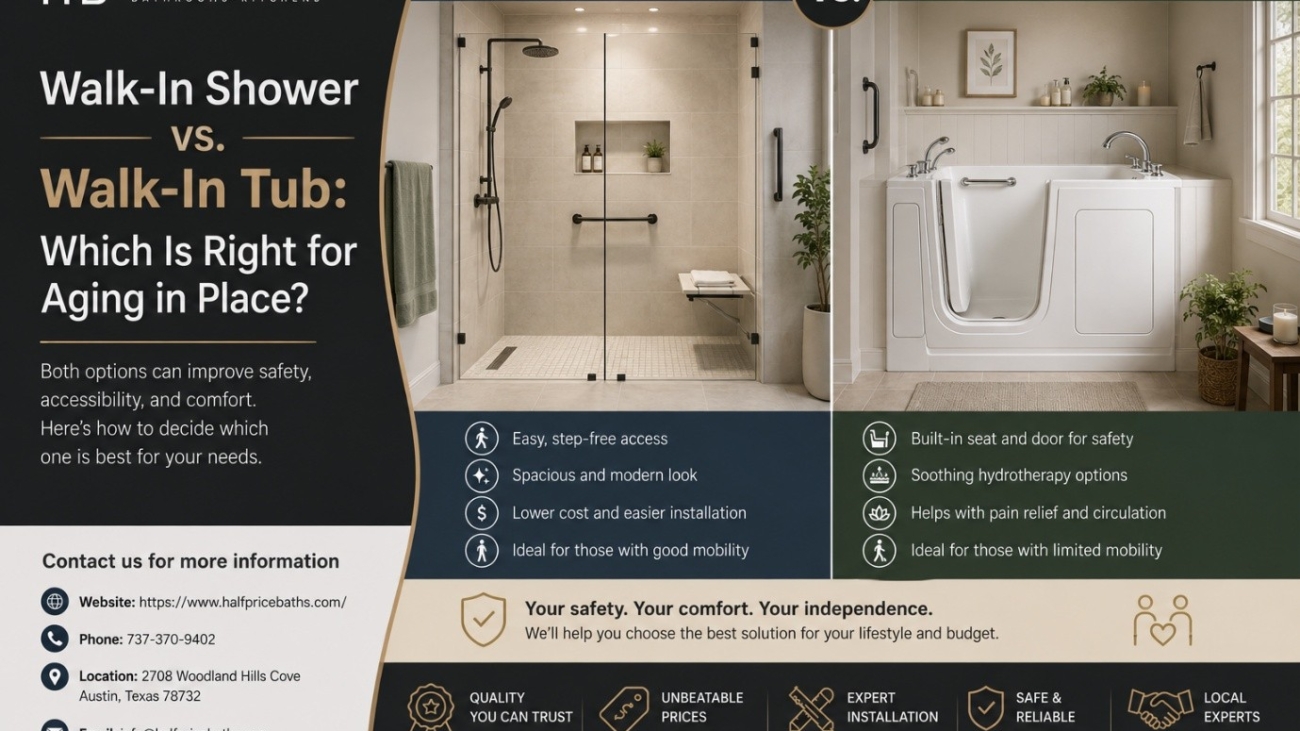
Both walk-in showers and walk-in tubs are designed to reduce safety risks and support independent living. A walk-in shower can provide easy entry, flexibility, and better accessibility, while a walk-in tub can offer a seated bathing experience with therapeutic benefits.

Understanding the differences between these two options can help you choose a bathing solution that supports your lifestyle today while preparing your bathroom for the years ahead.

What’s the Difference Between a Walk-In Shower and a Walk-In Tub?

A walk-in shower and a walk-in tub both improve bathroom accessibility, but they are designed for different bathing experiences. The main difference is how users enter, bathe, and exit the space.

How a walk-in shower works

A walk-in shower is a shower area designed with a low-threshold or barrier-free entry that allows users to step directly into the shower without climbing over a traditional bathtub wall. Many designs include a curbless entry, built-in seating, handheld showerheads, and safety features.

A walk-in shower can be used while standing or sitting, making it suitable for homeowners with different mobility needs. A roll in shower design can also allow wheelchair users to enter easily without needing assistance.

How a walk-in tub works

A walk-in tub is a bathtub with a watertight door that allows users to enter through a small opening instead of stepping over a high tub wall. After entering, the user sits down before filling the tub with water.

A walk-in tub is often selected by homeowners who prefer deep soaking, heated seating, or hydrotherapy features. However, users must wait for the tub to fill before bathing and drain completely before exiting.

Comparison Table: Walk-In Shower vs Walk-In Tub at a Glance

When comparing a walk in shower vs tub, consider safety, convenience, space, maintenance, and long-term value before making a decision.

Feature Walk-In Shower

Walk-In Tub

Safety/fall risk Easier entry with fewer movement challenges; can include seating and grab bars Safer than traditional tubs but requires entering and exiting while wet
Wait time Immediate access without filling or draining Requires waiting for filling and draining
Space needed Flexible designs fit many bathroom layouts Usually requires more space for installation
Caregiver access Open design allows easier assistance Enclosed design can limit caregiver movement
Maintenance Easier cleaning and fewer mechanical components Requires maintenance of doors and seals
Resale value Appeals to a wider range of buyers Best suited for buyers seeking accessibility features
Typical installed cost range Depends on size, materials, and customization Usually higher due to specialized equipment

Safety Comparison for Aging in Place

Safety is often the biggest concern when choosing a bathroom solution for aging in place. A properly designed accessible bathroom can reduce fall risks while improving comfort and independence.

Entry/exit and fall risk

The biggest safety advantage of a walk-in shower is the easier entry and exit. Traditional bathtubs require users to lift their legs over a high wall, which can become difficult with balance issues or limited mobility.

A curbless shower removes this barrier and creates a smoother transition between the bathroom floor and shower area. Understanding the difference between curb vs curbless shower designs can help homeowners choose a safer layout.

Additional safety features such as seating, non-slip flooring, and walk-in shower grab bars and ADA requirements can make daily bathing easier and safer.

A properly designed roll in shower can also support individuals who use wheelchairs or walkers by providing a completely accessible entrance.

The tub “wait time” tradeoff

When comparing walk in shower vs walk in tub for elderly, one important factor is the waiting period involved with walk-in tubs.

A walk-in tub requires users to enter the tub before filling it with water. After bathing, the user must remain seated until the water drains before opening the door and exiting.

This waiting period can be uncomfortable for some people, especially if they become cold while waiting. It may also create challenges for individuals who have difficulty sitting for longer periods.

A walk-in shower eliminates this issue because users can enter, bathe, and exit without waiting for water levels to change.

Emergency access if something goes wrong mid-bathe

When considering walk in shower vs walk in tub for elderly, emergency access should be part of the decision.

A walk-in shower usually provides a more open bathing area, making it easier for caregivers or family members to assist if an emergency occurs. The design also allows more room for movement.

Walk-in tubs may provide a secure seated bathing experience, but their enclosed structure can make emergency assistance more difficult.

For homeowners planning long-term accessibility, choosing the right design can improve both safety and peace of mind.

Accessibility for Wheelchairs, Walkers & Caregivers

Accessibility is not only about entering the shower safely. A well-designed bathroom should also provide enough space for mobility devices and caregiver assistance.

Roll-in / curbless shower access for wheelchair and walker users

A wheelchair accessible shower provides a safer bathing solution for individuals who use wheelchairs or walkers. These showers typically feature a wider entrance, level flooring, seating options, and easy-to-reach controls.

A roll in shower allows a wheelchair to move directly into the shower space without navigating steps or raised edges. This design can help users maintain independence while reducing the need for physical assistance.

Many homeowners planning an accessible bathroom remodel Austin project choose accessible shower designs because they provide flexibility for changing mobility needs.

How much space a caregiver needs to physically assist

Caregiver accessibility is an important factor that many homeowners overlook.

A walk-in shower generally provides more open space for caregivers to assist with bathing, transfers, and personal care. Features such as wider entrances, seating, and thoughtful layouts can make assistance safer and easier.

Homeowners exploring handicap walk-in shower ideas should consider not only personal mobility but also the space needed for another person to provide support when required.

A bathroom designed for aging in place should offer independence while also allowing flexibility for future care needs.

Cost Comparison: What You’ll Actually Pay

The cost of a bathroom accessibility upgrade depends on the size of the project, selected materials, plumbing requirements, and the number of safety features added. Both walk-in showers and walk-in tubs can improve bathroom usability, but their installation processes and pricing factors are different.

Homeowners should consider not only the initial investment but also long-term maintenance, ease of use, and how well the solution supports future mobility needs.

Typical installed cost range for a walk-in shower

A walk-in shower can be a cost-effective choice when converting an existing bathtub or updating an outdated bathroom layout. The final price depends on whether the project involves a simple replacement or a complete accessibility-focused renovation.

The walk-in shower cost in Austin can vary depending on factors such as shower size, materials, plumbing adjustments, waterproofing requirements, and accessibility upgrades.

Common factors that influence walk-in shower pricing include:

  • Size of the shower area
  • Choice of tile, fixtures, and finishes
  • Installation of seating and grab bars
  • Drainage improvements
  • Shower door or enclosure options
  • Plumbing changes
  • Custom accessibility features

A basic tub-to-shower conversion may require fewer modifications, while a fully customized accessible shower with premium materials and additional safety features may involve a higher investment.

Professional walk-in shower installation can help ensure proper waterproofing, drainage, and long-term performance.

Typical installed cost range for a walk-in tub

Walk-in tubs generally have higher installation costs because they include specialized features such as watertight doors, deep soaking areas, and optional therapeutic systems.

The final cost depends on:

  • Tub model and size
  • Door design and sealing system
  • Hydrotherapy or air jets
  • Plumbing modifications
  • Electrical requirements
  • Bathroom preparation work

While walk-in tubs can provide comfort and therapeutic benefits, homeowners should also consider future maintenance needs. Components such as doors, seals, and mechanical features may require additional attention over time.

What drives the price up or down for each

The cost difference between a walk-in shower and a walk-in tub depends on the specific bathroom and the homeowner’s goals.

Walk-In Shower Cost Factors

Walk-In Tub Cost Factors

Existing bathroom layout

Tub size and model

Custom finishes and materials

Hydrotherapy features

Plumbing relocation

Electrical installation

Accessibility upgrades

Door and sealing system

Shower enclosure options

Installation complexity

For many homeowners, the most valuable option is the one that provides long-term safety, comfort, and independence. A professional evaluation can help determine which solution fits your home and lifestyle.

Space & Existing Layout Considerations

Bathroom size and existing layout play an important role when choosing between a walk-in shower and a walk-in tub.

A walk-in shower can often be installed in the same location as an existing bathtub, especially when homeowners want to avoid major plumbing changes. Because showers can be customized in different sizes, they are often suitable for both small and large bathrooms.

A walk-in tub usually requires enough space for the tub unit, door operation, and safe movement around the bathing area. Some bathrooms may need additional modifications to accommodate the larger structure.

Before starting a renovation, consider:

  • Existing tub or shower footprint
  • Location of plumbing lines
  • Available floor space
  • Bathroom door clearance
  • Future mobility requirements

A properly planned layout can improve safety while making the bathroom easier to use. Choosing the right placement for seating, grab bars, and fixtures can also make daily routines more comfortable.

Resale Value: Which Do Buyers Prefer?

When considering resale value, walk-in showers generally have broader appeal among homebuyers. Modern, open shower designs are popular because they combine style, convenience, and accessibility.

A walk-in tub can also add value, especially for buyers who specifically need aging-in-place features or therapeutic bathing options. However, it may appeal to a smaller group compared with a well-designed accessible shower.

A bathroom upgrade that includes accessibility features without sacrificing appearance can provide the best balance. Features such as a wheelchair accessible shower, comfortable seating, and attractive finishes can make the space useful for current homeowners while appealing to future buyers.

Which One Is Right for You? A Simple Decision Framework

Choosing the best bathing option for aging in place depends on your current situation and how your needs may change over time.

Use this checklist to compare your options:

  1. Assess your current mobility level

     Consider how easily you can step, stand, balance, and move around the bathroom. If you need wheelchair access, walker support, or easier entry, a walk-in shower may provide better flexibility.

  2. Consider caregiver involvement

     If a caregiver, spouse, or family member assists with bathing, choose a design that allows enough room for safe movement. Open shower layouts typically provide easier access for hands-on assistance.

  3. Review your bathroom space

     Measure your existing bathroom and determine which option fits your current footprint. A walk-in shower may work better in smaller spaces, while a walk-in tub requires additional room.

  4. Compare your budget and renovation timeline

     Consider installation costs, maintenance needs, and how quickly you need the project completed. Some bathroom changes may require more construction than others.

  5. Think about future mobility needs

     A bathroom renovation should support your lifestyle for the next 5–10 years. Consider adding features such as seating, grab bars, wider entrances, and easy-to-use fixtures that can adapt as your needs change.

The right choice depends on your priorities. Some homeowners prefer the openness and flexibility of a walk-in shower, while others value the soaking comfort of a walk-in tub.

Make Your Bathroom Safer With Professional Accessibility Planning

Choosing between a walk-in shower and a walk-in tub is an important decision for creating a safer and more comfortable home. A professional consultation from us – Half Price Baths LLC, can help you evaluate your bathroom layout, mobility needs, and long-term goals.

If you are planning an accessible bathroom remodel Austin, schedule a free in-home accessibility consultation serving Austin, Dripping Springs, Bee Cave, and Steiner Ranch. We are available through mail – info@halfpricebaths.com or you can schedule a call at – 737-370-9402!

FAQ

Is a walk-in shower or walk-in tub safer for seniors?

Both options can improve bathroom safety compared with a traditional bathtub. A walk-in shower is often preferred because it provides easier entry, faster access, and better caregiver support. A walk-in tub may be a better option for individuals who prefer seated bathing and therapeutic features.

Can I have both in the same bathroom?

Yes, some larger bathrooms can include both a walk-in shower and a bathtub. However, this requires enough space and proper planning. Many homeowners choose one accessible bathing solution based on their mobility needs and available bathroom area.

How long does installation take for each?

Installation time depends on the complexity of the project. A walk-in shower conversion may take several days to a few weeks depending on customization. Walk-in tub installation time depends on the tub model, plumbing requirements, and bathroom preparation.

Does Medicare or insurance cover either option?

Medicare and many insurance plans generally do not cover standard bathroom remodeling costs. However, coverage may vary depending on specific circumstances, insurance policies, and available assistance programs. Homeowners should check directly with their provider.

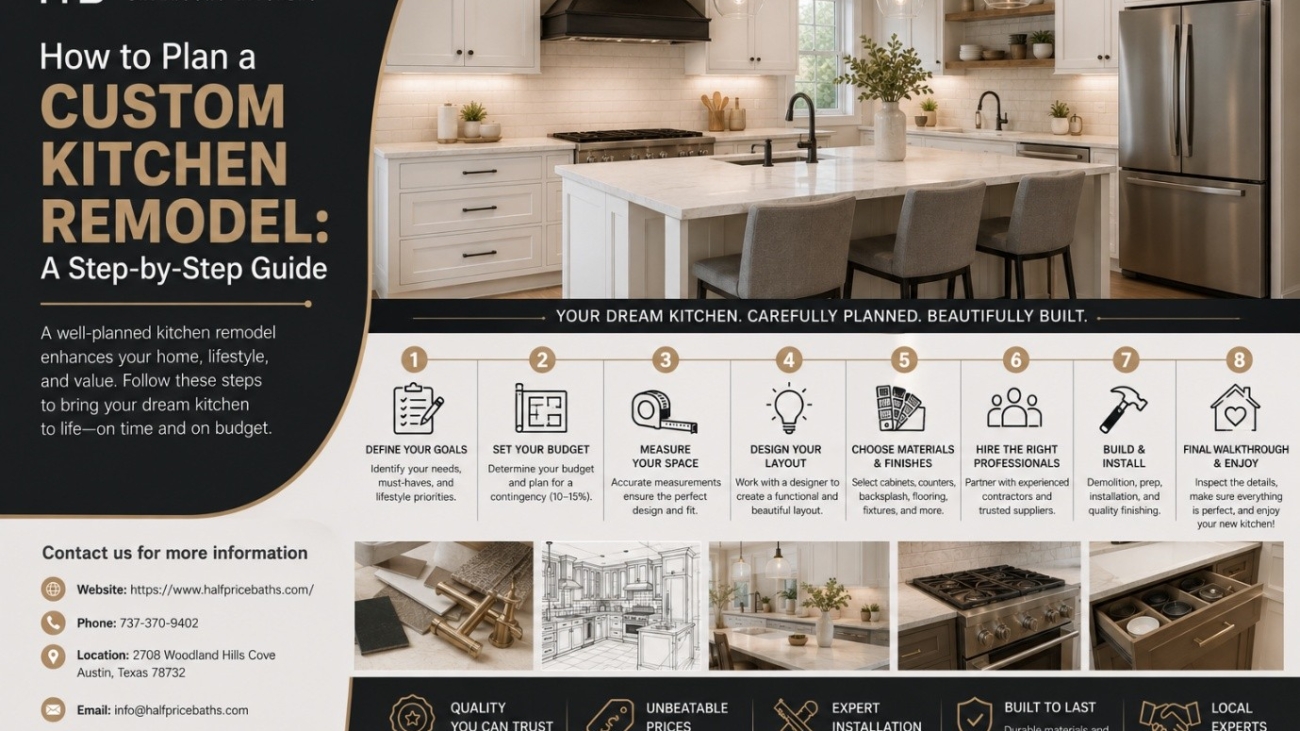
How to Plan a Custom Kitchen Remodel

How to Plan a Custom Kitchen Remodel: A Step-by-Step Guide

Summary: A successful custom kitchen remodel starts with proper planning, not just choosing designs and materials. This guide explains the ideal kitchen remodel decision order, from defining goals and setting a budget to selecting layouts, materials, permits, contractors, and timelines. Following a structured process helps homeowners avoid costly mistakes, reduce delays, and create a functional, beautiful kitchen.

Learning how to plan a kitchen remodel is one of the most important steps toward creating a kitchen that is both functional and visually appealing. While many homeowners immediately start looking at cabinet styles, countertops, or appliances, a successful remodel begins with careful kitchen remodel planning. Every decision you make—from setting your budget to selecting the layout and hiring a contractor should follow a logical sequence. Skipping or rearranging these decisions often results in unnecessary expenses, project delays, and design changes that could have been avoided.

Instead of treating your renovation as a simple checklist, think of it as a series of connected decisions. Each step provides information that helps you make the next choice with greater confidence. For example, your budget influences your layout, your layout determines cabinet sizes, and your cabinet selection affects plumbing, electrical work, and appliance placement.

This guide follows the ideal kitchen remodel decision order, helping you make smart choices at every stage of the renovation. Whether you’re planning a complete kitchen transformation or upgrading an outdated space, following the right process can save time, reduce stress, and keep your project on track from start to finish.

Why Planning Order Matters More Than a Checklist

A standard kitchen remodel checklist is useful because it reminds you of important tasks, but it doesn’t explain when those tasks should be completed. That’s where a structured planning approach becomes more valuable.

Every remodeling decision depends on another. If you choose cabinets before setting a budget, you may end up exceeding your spending limit. If appliances are ordered before completing kitchen layout planning, they may not fit the final design. Likewise, changing layouts after plumbing or electrical work begins can create expensive delays.

Following the proper kitchen remodel decision order allows you to gather the right information before making commitments. Instead of making random choices based on inspiration photos, you’ll build your renovation one decision at a time. This organized approach improves communication with designers and contractors while helping you avoid common planning mistakes.

Ultimately, successful kitchen remodel planning isn’t about doing more—it’s about doing the right things in the right order.

Step 1 — Define Your Goals and Must-Haves

Before comparing materials or requesting contractor estimates, identify what you want your remodeled kitchen to accomplish. Every household uses its kitchen differently, so your priorities should reflect your daily routine rather than current design trends.

Start by separating essential improvements from optional upgrades.

Must-Haves

  • Increase storage capacity
  • Improve workflow between work zones
  • Replace outdated cabinets
  • Upgrade lighting
  • Improve countertop workspace
  • Add energy-efficient appliances
  • Create better organization

Nice-to-Haves

  • Waterfall kitchen island
  • Built-in coffee station
  • Smart appliances
  • Wine storage
  • Designer lighting fixtures
  • Premium countertop materials
  • Decorative open shelving

Creating these two lists helps you stay focused when budget adjustments become necessary later. If costs increase unexpectedly, you’ll know which features are essential and which can be postponed without affecting the overall functionality of your kitchen.

Defining clear priorities also helps designers and contractors recommend solutions that align with your goals, making the entire kitchen renovation process more efficient.

Step 2 — Set Your Budget Before You Design

One of the most common remodeling mistakes is designing the perfect kitchen before determining how much you can comfortably afford. In reality, budget planning should always come before selecting layouts, cabinets, countertops, or appliances.

Your budget influences nearly every decision during the renovation. It determines the quality of materials you can choose, the complexity of your layout, and the scope of structural changes that are financially realistic.

A comprehensive remodeling budget should include:

  • Cabinets
  • Countertops
  • Flooring
  • Appliances
  • Lighting
  • Plumbing fixtures
  • Electrical upgrades
  • Labor costs
  • Permit fees
  • Demolition
  • Waste disposal
  • Delivery charges
  • Temporary kitchen expenses
  • Contingency reserve

Many homeowners focus only on visible materials and overlook installation costs or unexpected repairs hidden behind walls. Plumbing issues, outdated wiring, and structural repairs can quickly increase expenses if they aren’t considered from the beginning.

Setting a realistic budget before making design decisions helps eliminate options that exceed your financial limits, saving both time and disappointment. It also allows your contractor to recommend practical alternatives without compromising the overall design.

For a detailed breakdown of renovation expenses, explore our budget planning resource and comprehensive kitchen remodel planning guide, where you’ll find cost estimates, budgeting strategies, and tips for maximizing your investment.

Remember, a well-planned budget doesn’t restrict creativity—it provides a framework that keeps every decision aligned with your financial goals.

Step 3 — Choose Your Layout and Work Zones

With your priorities established and your budget finalized, the next stage is kitchen layout planning. The layout serves as the foundation of your remodel because it determines how comfortably and efficiently you use the space every day.

Rather than selecting a layout based solely on appearance, consider how you cook, clean, entertain, and move around your kitchen. Good layouts minimize unnecessary walking while keeping essential work areas close together.

Some of the most popular kitchen layouts include:

  • U-shaped kitchens – Excellent for maximizing storage and countertop space while creating efficient work zones.
  • Galley kitchens – Ideal for compact homes, offering an efficient workflow with parallel counters.
  • L-shaped kitchens – A versatile option that works well for both small and medium-sized spaces while leaving room for dining areas or islands.
  • Open-concept kitchens – Perfect for modern homes where cooking, dining, and entertaining flow seamlessly together.

As you evaluate layouts, pay close attention to the primary work zones:

  • Food preparation
  • Cooking
  • Cleaning
  • Storage
  • Pantry access

Maintaining adequate clearance between cabinets, islands, and appliances improves safety and makes the kitchen more enjoyable to use. Even small layout adjustments can significantly improve workflow without requiring expensive structural modifications.

Avoid making unnecessary plumbing or gas-line relocations unless they provide meaningful functional improvements, as these changes often increase both labor costs and project timelines.

Thoughtful kitchen layout planning creates a kitchen that not only looks beautiful but also supports your everyday lifestyle for years to come.

Step 4 — Lock In Cabinets and Materials Early

Once your layout has been finalized, the next priority is selecting your cabinets and major materials. This is one of the most critical stages of kitchen remodel planning because cabinets often have the longest manufacturing and delivery times. While stock cabinets may be available within a few weeks, custom cabinets typically require six to twelve weeks before they are ready for installation.

Since cabinets determine the position of countertops, sinks, plumbing fixtures, appliances, and even electrical outlets, they should always be finalized before scheduling rough plumbing or electrical work. Changing cabinet dimensions after these systems have been installed can lead to costly rework and delays.

Along with cabinets, you should also confirm other long lead-time materials, including:

  • Countertops
  • Flooring
  • Backsplash tiles
  • Sink and faucet
  • Cabinet hardware
  • Lighting fixtures

Ordering these products early reduces the risk of supply chain delays affecting your project schedule. It also gives contractors accurate measurements for installation planning.

Before placing orders, verify every product specification, finish, and dimension. Even minor measurement errors can delay countertop fabrication or appliance installation.

Finalizing these selections early keeps the kitchen renovation process moving efficiently while giving every contractor involved a clear installation schedule.

Step 5 — Confirm What Permits You’ll Need

A common question homeowners ask during kitchen remodel planning is whether they need a permit for kitchen remodel projects. The answer depends on the type of work being completed rather than the overall size of the renovation.

In many cases, cosmetic improvements do not require permits. However, structural or mechanical changes almost always do.

A permit for kitchen remodel work is generally required when the project includes:

  • Removing or adding walls
  • Relocating plumbing lines
  • Installing new electrical circuits
  • Upgrading the electrical panel
  • Moving gas lines
  • HVAC modifications
  • Structural beam changes

Typically, permits are not required for cosmetic improvements such as:

  • Painting cabinets
  • Replacing cabinet doors
  • Installing new countertops
  • Updating flooring
  • Replacing a backsplash
  • Changing cabinet hardware

Permit requirements vary by municipality, so it’s important to check with your local building department before work begins. Your contractor may handle permit applications on your behalf, but you should confirm this before signing the contract.

Failing to secure the proper permits can result in fines, project delays, failed inspections, or complications when selling your home in the future.

For a detailed explanation of permit requirements and common scenarios, refer to our dedicated guide on permit for kitchen remodel projects.

Step 6 — Hire Your Contractor and Set the Timeline

By this stage, you’ve already completed the most important planning steps. Your goals are defined, your budget is established, your layout is finalized, and your materials have been selected. Now you’re ready to hire the right contractor.

Instead of requesting estimates based on rough ideas, provide each contractor with the same project scope. This makes comparing proposals much easier and ensures you’re evaluating similar services.

Before hiring a contractor, confirm:

  • Experience with kitchen remodels
  • License and insurance
  • References from previous clients
  • Warranty coverage
  • Detailed written estimate
  • Expected project duration
  • Payment schedule
  • Communication process

Once you’ve selected your contractor, work together to establish a realistic renovation schedule.

Your timeline should include:

  • Demolition
  • Rough plumbing
  • Electrical work
  • Inspections
  • Cabinet installation
  • Countertop templating
  • Countertop installation
  • Flooring
  • Painting
  • Appliance installation
  • Final inspections
  • Project walkthrough

Building a detailed schedule helps coordinate material deliveries with installation dates while reducing downtime between trades.

For a more detailed schedule, review our kitchen remodel timeline, which explains how long each remodeling phase typically takes and what factors can influence completion dates.

Hiring a qualified contractor after completing the earlier planning steps creates a smoother renovation with fewer unexpected delays.

Step 7 — Build In a Contingency and Finalize the Schedule

Even the most carefully planned remodeling projects can uncover unexpected challenges. Hidden plumbing leaks, outdated electrical wiring, water damage behind cabinets, or material delivery delays are common during renovations.

That’s why experienced professionals recommend setting aside a contingency fund equal to 15–20% of your overall remodeling budget.

This reserve helps cover:

  • Unexpected repairs
  • Material price increases
  • Design adjustments
  • Additional labor
  • Delivery delays

Beyond budgeting, finalize your renovation calendar by considering cabinet lead times, contractor availability, holiday schedules, and inspection appointments.

Avoid scheduling major remodeling work immediately before holidays or important family events. Giving yourself extra flexibility reduces stress if unexpected delays occur.

A realistic contingency plan is one of the smartest parts of successful kitchen remodel planning, ensuring your project stays on track even when surprises arise.

Common Planning Mistakes to Avoid

Even homeowners with detailed plans can make decisions that create unnecessary delays or expenses. Understanding these common mistakes can help you avoid costly setbacks throughout the kitchen renovation process.

Some of the biggest planning mistakes include:

  • Ordering appliances before completing kitchen layout planning, only to discover they don’t fit the final design.
  • Beginning demolition before confirming whether a permit for kitchen remodel is required.
  • Designing the kitchen before completing budget planning, resulting in expensive redesigns later.
  • Forgetting to include a contingency reserve for unexpected repairs.
  • Selecting custom cabinets too late, delaying the entire installation schedule.
  • Hiring contractors before clearly defining project goals and expectations.
  • Choosing materials based only on appearance instead of durability and maintenance.
  • Making layout changes after plumbing and electrical work has already begun.
  • Ignoring manufacturer lead times for cabinets, countertops, and specialty appliances.
  • Treating a kitchen remodel checklist as a random list of tasks instead of following the proper kitchen remodel decision order.

Avoiding these mistakes improves communication between homeowners, designers, suppliers, and contractors while keeping the renovation organized from beginning to end.

Custom Kitchen Remodel Planning Checklist

The following kitchen remodel checklist summarizes the essential planning steps in the correct order.

Step

Action

Step 1 Define your renovation goals and separate must-haves from nice-to-haves.
Step 2 Complete budget planning before making design or material selections.
Step 3 Finish kitchen layout planning based on workflow, storage, and functionality.
Step 4 Finalize cabinets, countertops, flooring, and other major materials early.
Step 5 Confirm whether a permit for kitchen remodel is required before construction begins.
Step 6 Hire a qualified contractor and establish a realistic kitchen remodel timeline.
Step 7 Reserve a 15–20% contingency fund and finalize the complete renovation schedule.

Following this structured checklist ensures every decision supports the next one. Instead of revisiting earlier choices or making expensive corrections, you’ll move confidently through each phase of your remodel with a clear plan.

Conclusion

Understanding how to plan a kitchen remodel is about more than choosing attractive finishes—it’s about making informed decisions in the right sequence. By defining your goals, completing budget planning, finalizing kitchen layout planning, selecting materials early, confirming permits, hiring the right contractor, and preparing for unexpected costs, you’ll create a renovation process that is efficient, organized, and far less stressful.

Whether you’re planning a simple update or a complete transformation, following these proven planning steps helps you avoid common mistakes while maximizing your investment. If you’re ready to begin your renovation, contact our team at Half Price Baths LLC, today for expert advice and a personalized kitchen remodel planning guide designed to bring your vision to life. You can either drop us a mail at – info@halfpricebaths.com or directly connect with us at – 737-370-9402!

FAQ

How far in advance should I start planning a kitchen remodel?

It’s best to begin kitchen remodel planning at least three to six months before construction starts. This allows enough time for budgeting, design revisions, contractor selection, permit approvals, and ordering materials with longer lead times.

What should I decide first during a kitchen remodel?

When learning how to plan a kitchen remodel, your first decision should always be defining your goals and setting a realistic budget. These choices influence every other aspect of the renovation, including layout, materials, and contractor selection.

Do I need an architect or just a kitchen designer?

If your project focuses on replacing cabinets, countertops, flooring, and appliances, a kitchen designer is often sufficient. However, if you’re removing walls, changing the home’s structure, or making major layout changes, you may also need an architect or structural engineer.

Why is following the correct planning order important?

Following the proper kitchen remodel decision order helps reduce redesigns, prevents scheduling conflicts, minimizes unexpected costs, and keeps every contractor working from the same plan. It creates a more organized renovation and improves the chances of completing the project on time and within budget.


Top 2026 Austin Trends

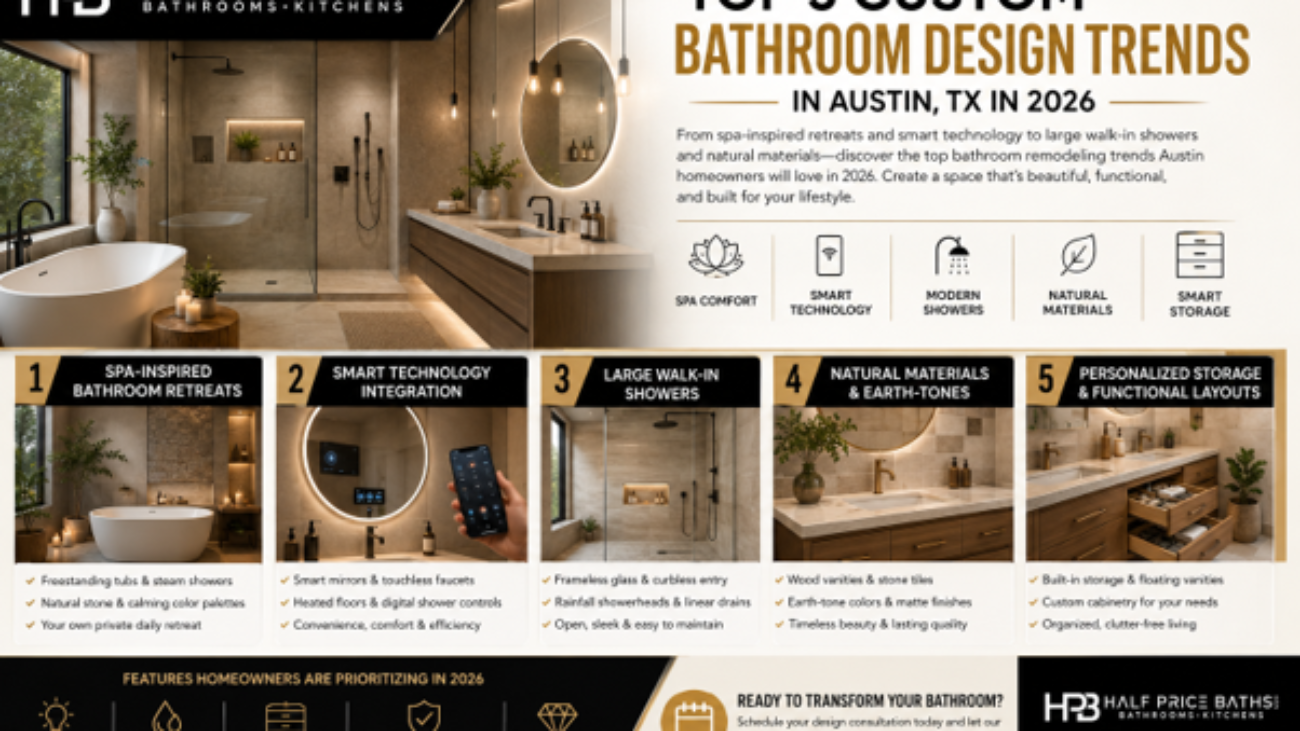
Top 5 Custom Bathroom Design Trends in Austin, TX in 2026

Summary: This guide highlights top 2026 bathroom remodeling trends for Austin homeowners. It covers spa-inspired features, smart technology, and large walk-in showers. Readers learn how to plan functional layouts and pick durable materials. The post helps families plan luxury upgrades without the stress of overpriced designer fees.

Every Austin homeowner deserves a beautiful, private space to relax. We see a massive shift toward highly personal, comfortable layouts. You want a bathroom custom design remodel that matches your exact lifestyle. It is completely possible to get stunning results without paying high prices or dealing with pushy salesmen.

We handle everything from the initial design to the final installation. Our team builds functional spaces using modern aesthetics. You get a stress-free experience from day one. Let us look at the top 2026 trends you should know before starting your project.

Explore our Bathroom Remodeling Services Page.

Why Custom Bathroom Remodeling Is Growing in Austin

Rising home renovation trends in Austin show a clear focus on comfort. Local families want homes that heavily support daily wellness. A basic builder-grade room simply no longer cuts it. Homeowners want highly personalized layouts that fit their exact morning routines perfectly. Check out our Luxury Bathroom Renovation Services.

A proper custom bathroom remodel offers immense long-term value. It brings that expensive spa-like feeling straight into your house. You get a beautiful upgrade that actually makes daily life much easier. Investing in quality craftsmanship pays off for years to come. Your home instantly feels more valuable and functional.

Trend #1: Spa-Inspired Bathroom Retreats

Freestanding soaking tubs create an incredible focal point right away. Oversized walk-in showers give you plenty of room to breathe. Many folks are adding steam shower systems for total relaxation. These features turn an average room into a private retreat. Browse our Spa Bathroom Design Gallery for visual ideas.

You want warm and calming color palettes on the walls. Natural stone finishes bring a highly organic, grounding feel to the space. Quality high end bathroom renovations prioritize this relaxing atmosphere. You walk in and immediately feel the day’s stress melt away completely. Good design creates instant peace.

Trend #2: Smart Technology Integration in Your bathroom custom design remodel

Smart mirrors with built-in LED lighting are extremely popular now. Touchless faucets keep the sink area much cleaner every single day. Heated flooring systems make cold winter mornings surprisingly pleasant. Technology simply makes the room function better for your whole family. It is a highly practical modern upgrade.

Digital shower controls let you set the exact water temperature. Voice-controlled lighting and ventilation keep your hands completely free. Energy-efficient bathroom technology lowers your monthly utility bills significantly. Modern upgrades are practical, easy to use, and incredibly reliable over time. They make your house work harder for you.

Trend #3: Large Walk-In Showers With Minimalist Design

Frameless glass enclosures create a sleek, open appearance instantly. Curbless shower entry designs remove annoying tripping hazards completely. Oversized rainfall showerheads deliver a truly luxurious washing experience. See our Walk-In Shower Remodeling Services for excellent local examples. Open layouts make cleaning the floor much faster and easier.

Linear drains look very clean and drain water much faster. Open-concept bathroom layouts make small spaces feel twice as large. Minimalist fixtures and finishes keep the visual clutter way down. You get a highly functional room that looks stunningly clean. Less clutter means a much calmer morning routine.

Trend #4: Natural Materials & Earth-Tone Finishes

Wood vanities add incredible organic texture to the room. Large-format stone tiles mean fewer grout lines for you to scrub. Matte black and brushed gold fixtures bring a sharp modern edge. These choices bring genuine warmth into modern bathrooms. They create a very inviting, comfortable environment for everyone.

Earth-tone color palettes make the space feel very natural. Sustainable and eco-friendly materials are a huge priority for 2026. You want materials that look beautiful but also last for decades. It is about balancing nature with daily practicality. Earth tones never go out of style in home design.

Trend #5: Personalized Storage & Functional Layouts

Built-in storage solutions keep your counters completely clear of mess. Floating vanities make the floor space look much larger visually. Hidden storage compartments hide your daily grooming tools safely out of sight.

Check out our Custom Vanity & Storage Solutions Page. Organization makes your routine much faster.

Double vanity layouts stop morning arguments over shared sink space. Custom cabinetry fits your exact spatial needs perfectly. Space optimization for everyday convenience is our main design goal. Smart layouts ensure everything has a proper, easy-to-reach place. You never have to dig through messy, cramped drawers ever again.

Features Homeowners Are Prioritizing in 2026

Comfort-focused layouts matter much more than simple visual appeal today. Better lighting design completely changes how you start your morning routine. Increased storage functionality keeps the room looking perfectly neat. You need spaces that work for your specific lifestyle. High functionality drives the very best remodeling design choices.

Water-efficient fixtures save natural resources without losing steady water pressure. Durable low-maintenance materials mean you spend less time cleaning up. Luxury finishes add that final, polished touch to the entire room. Smart design choices make your daily routines much smoother. You save time, money, and unnecessary physical effort.

Choosing the Right Materials for a High-End Bathroom Remodel

Quartz and marble countertops look elegant and resist ugly stains. Porcelain and natural stone tile handle heavy foot traffic easily. Premium plumbing fixtures will not leak or break down quickly. Learn more details on our Bathroom Material Selection Guide. Good materials protect your home from sudden water damage.

Moisture-resistant cabinetry prevents warping and ugly water damage over time. Durable flooring materials keep you safe from sudden, dangerous slips. Balancing luxury with practicality is the true secret to success. You want striking beauty that easily handles real daily life. Quality products save you from expensive future repairs.

How to Plan a Successful Custom Bathroom Remodel

Define Your Goals

Start by identifying your exact luxury upgrades and daily needs. You might want better functionality or a completely improved floor layout. Good planning naturally leads to heavily increased home value. Know exactly what you want before knocking down any walls. Clear goals keep the whole project moving very smoothly.

Establish a Realistic Budget

Prioritize your absolute must-have features right from the start. Allocate proper funds for both quality materials and skilled labor. Always plan for unexpected expenses hidden safely behind the walls. A clear budget keeps the whole project totally stress-free. Financial transparency builds deep trust between you and the builder.

Work With Experienced Remodeling Professionals

The importance of solid design expertise is absolutely massive today. Custom planning and careful project management prevent very costly construction delays. You need guaranteed quality craftsmanship and proper, safe installation. Visit our Bathroom Remodeling Consultation Page to start planning today. Remodeling experts easily handle all the heavy lifting for you.

Mistakes to Avoid During a Luxury Bathroom Renovation

Choosing fleeting trends over real daily functionality is a huge trap. Poor lighting placement leaves ugly, dark shadows on your face. Insufficient storage planning causes instant, frustrating countertop clutter. Read our handy guide on Bathroom Remodeling Mistakes to Avoid. Smart planning stops these very common errors in their tracks.

Ignoring proper ventilation needs causes dangerous, fast-spreading indoor mold growth. Using low-quality materials guarantees a very short lifespan for plumbing fixtures. Overcrowding the layout makes the entire room feel completely cramped. Give your beautiful new fixtures plenty of comfortable breathing room. Proper spacing makes the bathroom highly functional and safe.

Why High-End Bathroom Renovations Add Long-Term Value

You get significantly improved daily comfort every single busy morning. A beautiful upgrade brings heavily increased resale appeal to home buyers. Better energy efficiency lowers your monthly home running costs. Smart modern updates actually pay you back over time. It is a highly practical investment for any local family.

Enhanced modern aesthetics make the whole home feel entirely fresh. Long-lasting durability means you will not have to remodel again soon. Higher homeowner satisfaction is the single most important final result. You will genuinely love waking up to your new space. Quality work provides absolute, lasting peace of mind.

Creating a Bathroom That Fits Your Lifestyle

Designing for busy families requires tough, highly easy-to-clean hard surfaces. Luxury master bathroom ideas focus deeply on pure, uninterrupted home relaxation. Accessibility and aging-in-place considerations keep you completely safe forever. We intentionally build spaces that grow with your family. A smart layout adapts to your changing daily needs.

Blending high style with daily practicality takes real professional skill. Personalizing the space for everyday use is our main remodeling specialty. We make sure the final result matches your exact vision. A great room heavily supports your specific morning routine. You absolutely deserve a bathroom that simply works flawlessly.

Conclusion

We highly encourage you to explore exciting bathroom remodeling ideas for 2026. A great layout transforms your entire daily routine for the better. We always recommend working with experienced bathroom renovation professionals. They protect your home and your financial investment. You get beautiful results without the typical construction headaches.

We invite readers to schedule a friendly design consultation today. A functional and luxurious bathroom space holds incredible long-term value. Let us build a room that makes you happy. We invite you to transform your space with us. At Half Price Baths LLC, our team guarantees a stress-free, beautiful remodel. Contact us today!

Frequently Asked Questions

1. How long does a bathroom renovation take?

A typical full remodel takes about three to four weeks. Timelines depend heavily on the project size and custom material availability.

2. Do I need a permit for remodeling?

Yes, major plumbing and electrical changes require city permits. Our design-build team handles all necessary local paperwork for your absolute convenience.

3. Are walk-in showers a good investment?

Absolutely. Walk-in showers improve daily safety and dramatically boost your home’s resale value. They are highly functional and look incredibly sleek.

4. Can I stay in my home during construction?

Yes, you can stay. We keep the work area fully sealed and completely clean. We respect your family’s daily living space.

5. What is the best flooring for a bathroom?

Porcelain tile is the top choice. It is highly durable, totally waterproof, and incredibly easy to clean on a daily basis.


Freestanding Bathtubs

Homeowner’s Guide to Freestanding Bathtubs: Comfort, Layout Ideas & Sizing Tips

Summary: This comprehensive guide explores freestanding bathtubs for modern Austin bathroom remodels. It covers ergonomic comfort factors, standard tub sizes, and popular layout choices like wet rooms. Readers learn how to plan floor space, select durable materials, and avoid expensive installation mistakes. The post helps homeowners plan a beautiful, functional renovation project

Modern remodeling leans heavily on beautiful bathroom upgrades. Homeowners often ask us: are stand alone tubs comfortable? They absolutely deliver incredible relaxation and a striking visual upgrade. We handle full-service design-build renovations across Austin. This guide covers comfort, clever layouts, accurate sizing, and smart ways to fit a standalone tub into your home.

Why Freestanding Tubs Have Become So Popular

Modern luxury bathroom trends focus on creating a personal retreat right at home. Homeowners want that exclusive, high-end hotel feeling without leaving their house. A spa-inspired home design melts away daily stress. These beautifully crafted fixtures completely change how a room feels. They offer an everyday escape from busy schedules.

A standalone fixture acts as a stunning centerpiece. It immediately upgrades the visual appeal of your entire space. Unlike standard built-in tubs, freestanding models offer unmatched flexibility in placement. They provide immense relaxation and genuine wellness benefits. You get a premium look without paying overpriced designer fees.

What Makes a Freestanding Tub Comfortable?

Homeowners constantly ask – are stand alone tubs comfortable compared to traditional built-in alcove baths. The answer is a resounding yes. Total comfort boils down to the fixture’s shape, construction material, and overall water depth. You want a bath that fully supports your back and keeps the water steaming hot.

Tub Shape and Ergonomic Design

Oval soaking tubs fit the natural curve of your spine perfectly. Slipper-style tubs feature a raised end for excellent neck and back support. Double-ended tubs allow two people to recline easily at the same time. These deep soaking designs cradle your body securely. Smart ergonomics ensure you never feel cramped.

Material and Heat Retention

Acrylic tubs feel naturally warm to the touch and resist chipping beautifully. Stone resin finishes hold heat brilliantly for much longer baths. Cast iron durability is completely legendary, though these models weigh a ton. Excellent warm-water retention benefits mean you spend less time constantly topping off the hot water.

Choosing the Right Depth and Length

Your comfort heavily depends on your specific body size and height. Tall individuals absolutely need longer tubs to avoid bent knees. Proper soaking depth considerations ensure the warm water covers your chest completely. You need adequate legroom and solid reclining support. Testing different sizes prevents serious buyer’s remorse later.

Combining a Freestanding Tub With a Walk-In Shower

Modern wet-room concepts place the tub directly inside the main shower area. Putting a stand alone tub in shower enclosures saves massive floor space. This open layout looks incredibly sleek and functional. It completely transforms standard washrooms into luxurious home spas. You get two premium features in one footprint.

Frameless glass enclosure ideas keep the splashing water perfectly contained. It creates a highly functional luxury bathroom design that breathes easily. This setup offers incredible space-saving benefits in larger bathrooms. You eliminate bulky dividing walls completely. Our team frequently builds these stunning Walk-In Shower Remodeling setups for local Austin families.

You can explore more ideas in our Modern Bathroom Design Gallery.

Planning the Right Layout for Your Bathroom

Good room flow requires measuring your available floor space very accurately. You must create comfortable walking clearance around all the main fixtures. Nobody wants to squeeze past a vanity just to brush their teeth. Proper spacing ensures your morning routine stays relaxed, easy, and entirely stress-free from start to finish.

Positioning the tub near windows creates a beautiful, natural focal point. Smart plumbing and drain planning prevent messy, expensive reworks later down the line. Balancing the tub placement with vanities and showers keeps the room highly functional. Proper design flow makes the entire remodeling process much smoother for everyone involved.

Understanding Standard Freestanding Tub Sizes

Knowing the exact dimensions of stand alone tub models is incredibly crucial for planning. Common bathtub lengths range from 55 to 72 inches across. Standard widths usually sit between 27 and 32 inches. Compact tubs work wonders for smaller bathrooms. Large soaking tubs perfectly suit spacious, luxurious master suites. We always recommend leaving at least four inches of spacing around the tub. Choosing the right dimensions guarantees maximum comfort. Read our Bathroom Layout Planning Guide for more help.

How to Choose the Right Tub Style for Your Space

Minimalist modern tubs feature clean lines and very smooth edges. Traditional clawfoot styles add beautiful vintage charm to older, historic homes. Deep Japanese soaking tubs fit perfectly into tight, awkward corners. Contemporary oval tubs blend smoothly with almost any modern decor. Matching the tub style with your bathroom design creates a cohesive look.

Find the Best Freestanding Tub Styles for Modern Bathrooms that reflect your personal aesthetic.

Design Ideas for Freestanding Tub and Shower Combos

Wet-room bathroom concepts completely transform how your daily routine functions. Frameless glass shower surrounds highlight beautiful, high-quality tile work. A center-placement tub layout instantly grabs attention when you open the door. Placing a tub beside the shower wall creates distinct wet and dry zones. These luxury spa-inspired bathroom designs make everyday life feel incredibly special. We focus on building clean, practical spaces that Austin homeowners love.

Are Freestanding Tubs Suitable for Small Bathrooms?

You do not need a massive room to enjoy these fixtures. Compact tub options fit surprisingly well into very tight spaces. A freestanding design actually creates excellent visual openness. It exposes more floor tile, making the room feel noticeably larger. You get a luxurious soak without sacrificing your square footage.

Smart placement strategies keep the entire room from feeling cramped or crowded. Clever corner installation ideas maximize your floor plan beautifully. We easily tuck smaller models away to optimize foot traffic. Maximizing space without overcrowding requires thoughtful, precise design work. We deliver high-quality results without pushing expensive, unnecessary structural additions.

Installation Considerations Before You Buy

Heavy tubs require strict floor support requirements to prevent structural sagging. Faucet placement options include elegant floor-mounted fillers or practical wall-mounted taps. Drain positioning must align exactly with your home’s existing plumbing lines. Proper waterproofing considerations protect your precious subfloor from hidden leaks.

Rushing this step causes massive headaches later.

The importance of professional installation simply cannot be overstated. A poorly installed drain leads to disastrous water damage downstairs. Our full-service team handles everything from initial demolition to final plumbing connections. We guarantee stress-free, totally transparent Bathroom Plumbing & Installation Services. You never have to worry about hidden contractor mistakes.

Maintenance Tips to Keep Your Tub Looking New

Cleaning around freestanding tubs takes a little extra mindful effort. A simple warm water rinse prevents annoying soap residue buildup over time. Caring for acrylic and stone finishes requires gentle, non-abrasive household cleaners. Maintaining your surrounding glass shower enclosures keeps the whole wet room shining. These long-term maintenance best practices save you hours of deep cleaning. A well-maintained bathroom looks brand new for decades.

Common Mistakes Homeowners Should Avoid

Choosing the wrong tub size completely ruins the bathroom’s flow. Ignoring the necessary spacing requirements makes floor cleaning practically impossible. Poor waterproofing leads directly to massive rot, mold, and structural issues. Improper drain placement forces highly expensive plumbing overhauls. Cramming too many fixtures ends up completely overcrowding the bathroom layout. Keep the design simple and spacious. Check out our guide on Bathroom Remodeling Mistakes to Avoid for a smooth project.

Creating a Spa-Like Bathroom at Home

A relaxation-focused bathroom design successfully melts away your daily stress. Layered lighting and elegant fixtures set a very calming, peaceful mood. Natural materials and warm textures make the space feel deeply grounded. You deserve a private retreat that feels completely separate from the busy outside world. Good design makes it happen.

Luxury features like heated floors perfectly complement beautiful freestanding tubs. Dimmer switches allow you to control the exact brightness during evening baths. Creating a calm and functional atmosphere improves your overall daily wellbeing. We specialize in bringing these high-end, custom touches to everyday middle-class homes without charging outrageous premium prices.

Conclusion

A beautiful tub instantly elevates your home’s entire vibe. It offers unmatched comfort and completely transforms your daily routine for the better. We encourage readers to explore freestanding tub options for their upcoming remodel. They bring incredible beauty, function, and relaxation into your house. Do not settle for outdated designs.

We highly recommend consulting bathroom remodeling professionals before starting demolition. We invite homeowners to request a custom, no-pressure bathroom design estimate today. Modern standalone tubs bring incredible beauty and daily functionality to your space. Contact Half Price Baths LLC today; our expert team provides stress-free, transparent design-build remodeling to transform your bathroom safely and affordably.

Frequently Asked Questions

1. Are freestanding tubs heavy?

Yes, weight varies by material. Acrylic tubs are lightweight, while cast iron models are very heavy and often require reinforced flooring before installation.

2. Do freestanding baths tip over?

No, professional installation secures the tub firmly to the floor. A properly installed drain and high-quality caulking keep the fixture completely stable.

3. How far from the wall should a freestanding tub be?

You should leave at least four to six inches of space between the tub and the wall. This gap makes cleaning the floor much easier.

4. Are freestanding tubs cold?

Not if you choose the right material. Stone resin and acrylic models hold heat exceptionally well. They keep your bathwater warm for long periods.

5. Do I need a special faucet for a freestanding tub?

Yes, these tubs usually require a floor-mounted tub filler or a wall-mounted faucet. Standard deck-mounted faucets rarely fit the thin edges of standalone tubs.


Before and After Kitchen Remodel

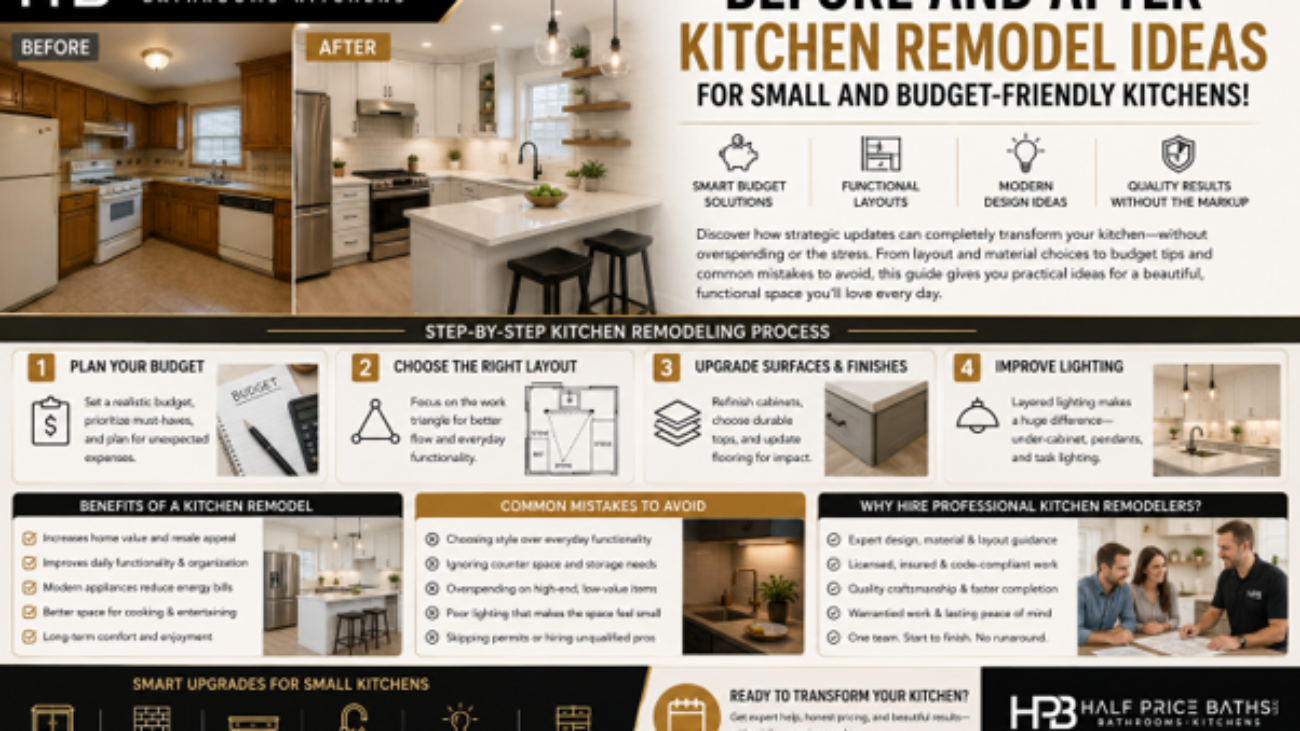
Before and After Kitchen Remodel Ideas for Small and Budget-Friendly Kitchens!

Summary: This guide reveals how strategic home updates change everyday living. We break down small kitchen improvements, practical budgeting steps, and modern design trends. Homeowners learn to avoid common renovation mistakes while choosing smart layout and material options. It offers clear answers for creating a functional, beautiful cooking space without premium prices or stressful contractor timelines.

Your kitchen should feel like the heart of your home, not a cramped closet. A smart before and after kitchen remodel updates your daily routine by fixing bad layouts. We focus on real value, turning tight spaces into functional cooking areas. Let’s explore easy ways to upgrade your home without premium markups.

Why Before and After Kitchen Remodels Inspire Homeowners

Seeing a real transformation changes how you look at your home. It helps you visualize hidden potential in an outdated layout. Dark corners become bright workspaces, and old walls disappear. A successful kitchen remodeling before and after proves you do not need a massive room for a modern, upscale feel.

Good planning turns these visual ideas into real home equity. Looking at successful projects helps you set smart goals for your space. You can easily spot which features match your family’s needs. This inspiration keeps your project grounded, making the design process feel simple, clear, and completely within your reach.

Budget Small Kitchen Remodel Before and After Ideas

You can achieve a breathtaking budget small kitchen remodel before and after look by keeping your existing layout. Moving plumbing lines quickly inflates your bill. Instead, try repainting your current cabinets a crisp, light color. This simple trick opens up the room, bouncing natural light to make tight spaces feel larger.

Swap heavy upper cabinets for sleek open shelving to add inexpensive storage. Swap out old, tarnished hardware for modern matte black pulls. Affordable quartz or durable laminate countertops offer luxury looks without the high cost. These minor cosmetic upgrades create a massive aesthetic shift on a modest, practical renovation budget.

Step-by-Step Kitchen Remodeling Process

Transforming your cooking space requires a predictable, organized approach to avoid costly mistakes. Following a structured plan keeps your project moving smoothly from messy demolition to final detail installation. Let’s break down the necessary stages so you can navigate your upcoming residential renovation with absolute clarity and calm confidence.

Step 1: Plan Your Kitchen Remodel Budget

A successful renovation starts with absolute financial clarity. Decide on a firm spending limit before looking at beautiful tile samples. Prioritize essential plumbing and structural items over luxury cosmetic upgrades. Setting aside a small cash cushion helps cover unexpected behind-the-wall surprises without stalling your project’s overall construction timeline.

Step 2: Choose the Right Kitchen Layout

Your layout dictates how easily you can cook, clean, and move around. Focus on the classic work triangle between your stove, sink, and refrigerator. Keep these areas close together to reduce unnecessary steps during meal preparation. A functional layout ensures your compact room feels efficient, comfortable, and completely user-friendly.

Step 3: Upgrade Cabinets, Countertops, and Flooring

Evaluate your cabinet boxes before choosing a total replacement. If the frames are sturdy, cabinet refacing saves thousands of dollars. Pair those refreshed cabinets with durable, non-porous countertop materials like quartz. Finish the look with waterproof luxury vinyl flooring, which withstands heavy foot traffic, accidental spills, and daily wear beautifully.

Step 4: Improve Kitchen Lighting

Good lighting completely transforms how you experience a room. You can view a stunning before and after budget small kitchen remodel just by layering your light sources. Install bright LED under-cabinet strips to illuminate your prep work properly. Add stylish pendant lights over your island to create an inviting focal point.

Benefits of a Kitchen Remodeling Project

Updating your cooking area directly increases your overall home market value. Buyers look at kitchens first, so a modern space secures a faster sale later. Beyond money, an update improves daily organization through tailored storage. You get a comfortable area for entertaining friends, cooking healthy meals, and enjoying stress-free mornings.

Modern renovations also cut down your monthly utility bills significantly. Energy-efficient appliances use less electricity and water, protecting your wallet. New LED lighting fixtures last for years without needing replacement. These hidden eco-friendly savings mean your beautiful new space keeps working for you long after the renovation work finishes.

Common Mistakes to Avoid During a Kitchen Remodel

Many homeowners make the mistake of choosing trendy aesthetics over everyday functionality. Forgetting to plan enough counter workspace leaves you feeling cramped during meal prep. Avoid overspending on luxury materials that do not match your neighborhood’s values. Skimping on high-quality lighting makes a newly renovated room feel dark and surprisingly small.

Ignoring your specific storage needs is another costly error. Always count your small appliances and dishes before finalizing your new cabinet blueprints. Ensure your trash cans and recycling bins have a dedicated, hidden spot out of plain sight. Planning these small details early prevents future frustration and keeps countertops clear.

Why Hire Professional Kitchen Remodeling Contractors

Working with a professional design-build firm eliminates the stress of managing independent subcontractors. Experts guide you through material selections, ensuring everything coordinates perfectly. Experienced craftsmen deliver precise installation, from custom cabinetry fitting to complex tile backsplashes. You get faster project completion because a unified team manages the entire construction schedule.

Licensed pros handle all city permits and structural inspections correctly. This protects your home’s safety and ensures future buyers face no legal issues. You receive long-lasting results backed by clear service warranties. This professional oversight gives you total, lasting peace of mind, knowing your financial investment is fully protected.

Our full-service design-build approach covers every step of your renovation journey. We manage initial consultations, custom layouts, complete demolition, and final detail installation without messy third-party handoffs. This cohesive process keeps your project transparent, predictable, and remarkably stress-free. You enjoy a smooth experience that respects your busy schedule.

Conclusion

Achieving your dream cooking space is entirely possible, even with a compact footprint. A well-planned before and after kitchen remodel balances smart budgeting with beautiful, high-quality finishes. You do not have to settle for cheap materials or endure pushy salespeople. Focus on clear layouts, reliable upgrades, and trusted workmanship to create a gorgeous home cooking space you love.

Ready to upgrade your home without premium designer markup stress? Check out our online project galleries to see real transformations in your neighborhood. To get started on your own stress-free renovation journey, contact Half Price Baths LLC for a free consultation today. We are always happy to help you build a beautiful, high-value space.

Frequently Asked Questions

1. How long does a small kitchen remodel take?

A typical small kitchen renovation takes between three to five weeks. This timeline covers demolition, custom cabinet installation, countertop fitting, and final plumbing hookups.

2. Can I keep my old kitchen layout to save money?

Yes. Keeping your sink, stove, and fridge in their original locations avoids expensive plumbing and electrical rewiring costs, saving a major portion of your budget.

3. What is the most durable countertop material for a busy kitchen?

Quartz is highly recommended for busy homes. It is completely non-porous, resists stains and scratches perfectly, and requires no regular sealing or heavy maintenance.

4. How can I make my small kitchen feel brighter?

Use light cabinet paint colors and add bright LED under-cabinet light strips. Open shelving also helps bounce light across the room, creating an airy feel.

5. Do you handle both kitchen and bathroom remodeling projects?

Yes. We provide full-service design-build remodeling for both kitchens and bathrooms, managing everything from initial design to final walkthrough with zero third-party stress.

Tub-to-Shower Conversion

Tub-to-Shower Conversion: Cost, Pricing & Remodeling Guide for Modern Bathrooms

Summary: This comprehensive guide breaks down modern tub-to-shower conversion projects for Austin homeowners. It covers real installation costs, design choices like groutless panels, and layout planning. Readers will learn how a streamlined design-build process eliminates high sales pressure and hidden fees, delivering a safe, beautiful, walk-in shower that adds immediate daily value to the home.

Stepping into a cramped, outdated bathtub every single morning feels frustrating and unsafe. If you are tired of high designer fees, understanding tub-to-shower conversion pricing helps you regain control over your home renovation budget right away. Swapping that old tub for a sleek walk-in shower instantly opens up your floor plan, updates your style, and makes daily life much easier.

Many homeowners choose to update their properties to improve daily functionality and long-term home value. Modern walk-in designs save physical space while giving your bathroom a clean, bright appearance. This guide will set clear expectations for your budget, the installation steps, material selections, and project planning tips.

Planning a bathroom update does not have to feel overwhelming or stressful for your family. You can easily transition from a clunky tub to a gorgeous shower layout seamlessly. To see how these upgrades fit into a complete home update, check out our Bathroom Remodeling Services.

 What is a Tub-to-Shower Conversion?

A tub to shower modification is a targeted project where installers remove your old basin. The team then builds a modern shower enclosure directly over that same footprint. This specialized process updates the most used part of your bathroom without altering the rest of the room.

This project differs from a full bathroom remodel because it leaves your floor plan intact. A complete renovation tears down every wall, shifts plumbing lines, and replaces every single fixture. A conversion focuses your budget where it matters most, saving you time and messy construction delays.

Homeowners frequently make this switch because they no longer use their old bathtubs for soaking. Traditional tubs feature high walls that are difficult to step over safely every day. Upgrading to a low-threshold basin provides an open layout that looks identical to a high-end luxury spa enclosure. Learn more on our Walk-In Shower Installation and see options on our Bathroom Renovation Services.

 Why Homeowners Choose Tub-to-Shower Remodels?

Opting for a tub to shower remodel solves multiple household problems at the exact same time. High tub ledges present real tripping hazards for young children and aging grandparents. Removing these barriers creates a safer environment that allows seniors to stay in their beloved homes much longer.

Modern walk-in showers also make your weekly bathroom cleaning chores incredibly fast and simple. Acrylic and composite surfaces resist stubborn soap scum and nasty mildew growth much better than old porcelain basins. You spend less time scrubbing on your knees and more time enjoying a clean home.

Minimizing the footprint of a bulky tub makes small bathroom layouts feel twice as large. This change maximizes your available floor space and allows more natural light to bounce across the room. If you plan to sell your Austin property down the road, this modern upgrade attracts eager buyers quickly.

Contact us for tub to shower conversion conversion in Austin & nearby areas to get started.

Step-by-Step Guide to a Tub-to-Shower Conversion

Step 1: Assess Your Bathroom Layout

Your team must measure the available space carefully before ordering any new installation materials. The technicians will check your current drain alignment and look for hidden water damage beneath the subfloor. Ensuring your plumbing lines are clear prevents expensive leaks from ruining your lower levels later on.

 Step 2: Choose the Right Shower Design

Next, you select a design that matches your aesthetic goals and storage needs perfectly. Options range from sleek frameless glass doors to open, minimalist walk-in designs for smaller spaces. Choosing a low-threshold base creates a seamless transition that makes the room feel completely integrated. 

 Step 3: Understand Tub-to-Shower Conversion Cost

Calculating your total tub to shower conversion cost early keeps your project on a predictable financial track. Basic packages utilizing acrylic wall inserts cost significantly less than complex, custom-tiled shower designs. Your overall pricing changes based on necessary plumbing adjustments, structural repairs, and your choice of hardware finishes.

  • Basic Conversion: Includes a durable acrylic base, matching wall surrounds, and standard chrome fixtures.
  • Mid-Range Remodel: Features premium groutless wall panels, bypass glass doors, and upgraded pressure-balanced valves.
  • Luxury Shower Remodel: Offers custom porcelain tilework, frameless glass enclosures, built-in benches, and dual showerheads.

You can plan your budget effectively by reviewing our comprehensive Bathroom Remodeling Cost Guide.

 Step 4: Find Reliable Tub-to-Shower Conversion Contractors

Finding a trustworthy contractor requires reading local reviews and checking active state licensing boards. Avoid companies that use pushy sales tactics or refuse to give you guaranteed written estimates upfront. Comparing labor warranties ensures your investment stays protected against installation mistakes for many years to come.

Schedule a visit through our Page – https://www.halfpricebaths.com/free-consultation/

 Step 5: Select Shower Features & Accessories

The right accessories personalize your new space to match your physical comfort and safety requirements. Installing built-in bench seating and sturdy grab bars provides excellent balance support for every family member. Adding recessed wall niches keeps your shampoo bottles organized and completely off the shower floor base.

Step 6: Prepare for Installation Day

The construction process starts with careful demolition to remove the old cast iron or steel tub safely. Plumbers then upgrade the drain pipes and install advanced waterproofing layers across the open wall framing. A final inspection verifies that every seal is completely airtight before your first shower.

Average Tub-to-Shower Conversion Pricing

Understanding tub-to-shower conversion pricing helps you pick the best materials for your long-term goals. Your total bill reflects the size of your bathroom and the current condition of your underlying plumbing pipes. The table below outlines what homeowners typically expect for common shower material installations.


Material System

Average Installation Time

Maintenance Needs

Cost Range

Standard Acrylic Panels

1 – 2 Days

Low (Wipe Clean)

Budget-Friendly

Groutless Composite Panels

2 – 3 Days

Very Low (No Grout)

Mid-Range

Custom Ceramic Tile

5 – 7 Days

Medium (Sealing Needed)

Luxury / Premium

 Best Materials for a Tub-to-Shower Remodel

Selecting the right wall surfaces changes how much effort you spend maintaining your bathroom each week. Acrylic panels are highly budget-friendly, resist scratching, and can be installed in just a couple of days. They provide a smooth, non-porous surface that wipes clean with a basic microfiber cloth.

Groutless composite systems offer the gorgeous look of natural stone without the heavy maintenance hassle. These thick panels prevent water from seeping into your drywall, eliminating dangerous mold growth entirely. They give your home a high-end, contemporary look while remaining highly resistant to impact damage over time.

Porcelain and ceramic tiles offer unmatched design flexibility with endless color and pattern options. However, traditional tile requires regular grout sealing to prevent staining and moisture absorption issues. Lightweight fiberglass kits work well for guest bathrooms but tend to wear down faster under heavy daily use.

 Benefits of Converting a Tub to a Walk-In Shower

A tub to shower conversion drastically reduces the chance of slips and falls inside your wet environment. Stepping over a tiny two-inch threshold is much easier than climbing over a high tub wall. This simple structural change brings immense peace of mind to homeowners who wish to live independently.

Walk-in configurations also maximize water efficiency by utilizing modern low-flow fixtures that maintain excellent water pressure. You use fewer gallons per minute compared to filling up a massive, old soaking tub basin. This eco-friendly switch lowers your monthly utility bills while helping protect our local water supply.

Common Challenges During a Tub-to-Shower Conversion

Removing an old tub can sometimes uncover hidden mold issues or rotted wood framing behind the walls. Older plumbing valves might not meet current building codes and will require a quick professional upgrade. Correcting these hidden problems early prevents costly structural issues from destroying your new investment later down the road.

How Long Does a Tub-to-Shower Conversion Take?

A professional team can complete a standard acrylic shower installation in just two to three days. Custom tile projects require closer to a full week because the mortar needs time to dry completely. A clear project timeline ensures your family can plan around the minor construction noise without experiencing stress.

Why Hire us Professional Tub-to-Shower Conversion Experts

Handling waterproofing and heavy plumbing yourself often leads to expensive leaks and code violations. Certified installers understand how to slope your shower pan correctly so water moves straight down the drain line. Investing in professional labor protects your home value and gives you a beautiful finish that lasts.

Working with experienced professionals ensures that your project moves forward without any unexpected delays. Experts handle the building permits and material deliveries while keeping your workspace completely clean.

To discuss your ideas with our local team, feel free to Schedule a Bathroom Remodeling Consultation

Parting Notes

Upgrading an old bathtub to a modern walk-in shower improves home safety, simplifies cleaning, and boosts property value. Clear pricing transparency allows you to make smart material choices without dealing with aggressive, high-pressure sales consultants.

At Half Price Baths LLC, we manage your entire design-build remodeling project with honest, clear communication from start to finish. Our team handles the initial layouts, the demolition work, and the final installations to keep your experience completely stress-free. Let us design a beautiful, safe bathroom space that your family will enjoy using every single day.

Frequently Asked Questions

Q1: Can you convert a tub to a walk-in shower without moving the existing plumbing pipes?

Yes. Professional installers utilize the existing drain and water supply locations to save you money on extensive plumbing line modifications.

Q2: What are the main benefits of using groutless shower wall panels over tile?

Groutless panels eliminate mold-prone scrub areas, install much faster than individual tiles, and provide a seamless, modern look.

Q3: Will removing my only bathtub hurt the eventual resale value of my home?

Keeping at least one bathtub in the home is ideal for young families, but converting a second tub into a walk-in shower boosts modern appeal.

Q4: How do contractors protect bathroom floors against water leaks during a conversion?

Installers apply multi-layer liquid waterproofing membranes or durable sheet barriers over the subfloor before setting your shower base.

Q5: Are low-threshold shower bases safe for seniors who are planning to age in place?

Yes. A low-threshold entry eliminates the risk of tripping, making it easy to step inside or add a shower bench later.

Kitchen Remodeling Ideas

Top Kitchen Remodeling Ideas to Upgrade Your Home!

Overview: This blog explains practical and modern kitchen remodeling ideas that improve space, function, and style. It covers layouts, trends, budget tips, and common mistakes while guiding homeowners toward smarter design choices. The focus stays on creating kitchens that feel easy to use, visually refined, and aligned with real-life needs through expert-backed insights.

Most kitchens fail not because they are small or outdated, but because they are planned like showrooms, not lived-in spaces. That is where most kitchen remodeling ideas go wrong. You want beauty, yes. But you also want flow, comfort, and quiet efficiency. What if the smartest upgrade is not what you think? Stay with me.

Modern Kitchen Remodeling Ideas That Feel Effortless

A modern kitchen is not just glossy cabinets and steel finishes. It is how your space responds to you. Think soft-close drawers, hidden storage, and lighting that shifts with your mood. The best kitchen remodeling ideas begin with how you move, cook, and pause in the space.

Now here is the twist. The most elegant kitchens often look simple, almost bare. But behind that calm look sits clever planning. Built-in appliances, flush surfaces, and layered lighting create that quiet luxury. You see less, but you experience more. Curious how designers hide so much in plain sight? That is where expert planning steps in.

Small Kitchen Remodeling Ideas That Expand Your Space

A small kitchen is not a limitation. It is a chance to get creative. The right ideas on kitchen remodeling can make your space feel twice as big without breaking walls. Start with vertical storage. Tall cabinets draw the eye up and free your counters.

Use light shades, reflective backsplashes, and under-cabinet lighting. These tricks bounce light and open the space. Sliding shelves and pull-out corners are like hidden pockets. You will wonder how you ever lived without them.

Think of your kitchen like a suitcase. Pack it smartly, and suddenly, everything fits. That is the magic of smart remodeling.

Kitchen Layout Ideas That Actually Work for You

A beautiful kitchen that slows you down is not worth it. Layout is everything. Whether you choose an L-shape, U-shape, or open concept, your kitchen must support your daily rhythm.

The classic work triangle still works. The sink, stove, and fridge should sit in easy reach. But here is something many miss. Your prep space matters just as much. Leave breathing room between zones.

Open kitchens feel social and airy. L-shaped layouts save space and improve flow. The best choice depends on how you live, not what trends say. A good designer listens before they draw.

Trending Kitchen Features You Will See Everywhere Soon

Trends come and go, but some changes stay. In 2026, kitchens are becoming softer and smarter. Matte finishes replace high gloss. Warm wood tones return. Smart appliances quietly do their job without flashing screens.

Touchless faucets, built-in charging stations, and hidden pantries are gaining ground. These are not just upgrades. They make life easier.

But here is something most blogs will not tell you. Trends only work when they fit your home’s personality. Blindly copying can feel out of place. The real trend is thoughtful design.

Budget-Friendly Kitchen Remodeling Ideas That Look Premium

You do not need a huge budget to create impact. The best kitchen remodel ideas on a budget focus on high-visibility changes. Swap cabinet handles. Update lighting. Repaint cabinets instead of replacing them.

Quartz-look laminates and engineered surfaces give you a rich finish at a lower cost. Open shelving can reduce cabinetry costs and add charm.

Think of it like dressing well. A few smart choices can elevate the whole look. Spend where it shows. Save where it does not. That is how you balance cost and style.

Kitchen Remodeling Mistakes to Avoid Before You Start

Even the best plans can slip. Common kitchen remodel mistakes often come from rushing decisions. Choosing style over function is the biggest one. A stunning kitchen that lacks storage will frustrate you daily.

Ignoring lighting layers is another mistake. One ceiling light is never enough. You need task lighting, ambient lighting, and accent lighting.

Skipping professional guidance can cost more later. Design, material sourcing, and installation need precision. Fixing errors later is always more expensive than doing it right the first time.

And here comes the second twist. Many homeowners regret what they did not include, not what they did. Plan ahead. Think long-term.

Summing Up

A well-designed kitchen is not just a place to cook. It becomes the heart of your home, where every detail supports your daily life. The right choices blend beauty, comfort, and function in a way that feels natural and lasting. If you want expert help, we at Half Price Baths bring custom design, fast turnaround, and high satisfaction at half the price.

FAQs

1. What is the most important factor in kitchen remodeling?

Function comes first. Your kitchen must support your daily routine. Layout, storage, and lighting matter more than surface finishes.

2. How can I make my small kitchen look bigger?

Use light colors, vertical storage, and reflective surfaces. Add layered lighting to create depth and openness.

3. What are affordable ways to upgrade my kitchen?
Focus on visible updates like cabinet paint, new handles, and better lighting. These changes give strong visual impact.

4. How long does a kitchen remodel take?

A standard remodel can take 3 to 8 weeks. Timelines depend on design complexity and material availability.

5. Should I hire a professional for kitchen remodeling?

Yes. Professionals ensure proper design, material selection, and installation, saving time and preventing costly mistakes.


Freestanding Tubs

Installation Requirements for Freestanding Tubs: The Ultimate Guide!

Overview: This guide explains freestanding tub installation requirements in simple terms, covering space, plumbing, flooring, and cost factors. It helps homeowners understand what is needed before installation, avoid common mistakes, and make confident decisions. The focus stays on practical steps, smart planning, and achieving a clean, functional bathroom setup with lasting comfort.

A freestanding tub looks simple. Just place it and relax, right? Not quite. Behind that calm shape sits a list of details most homeowners miss. The truth is, ignoring freestanding tub installation requirements can turn a dream bath into a daily headache. And one small mistake here can cost more than the tub itself. Want to know why?

What Space Do You Really Need for Freestanding Tub Installation Requirements?

You might think any open spot will work. It will not. A freestanding tub needs breathing room. At least six inches around, often more for cleaning and comfort. This space is called clearance, and it changes how your bathroom feels. If your bathroom feels tight, the tub will feel even tighter. That is why planning early matters. A well-placed tub feels like it belongs. A poorly placed one feels like furniture in the wrong room.

Plumbing Requirements You Should Not Overlook

Plumbing is where beauty meets reality. This is where most plans pause. A clean design depends on hidden pipes, smart placement, and careful setup. If this part goes wrong, you will notice it every single day. Let us break it down simply.

Drain Placement That Aligns Perfectly

Your tub drain must match your floor drain. Sounds simple, but it rarely lines up by accident. The freestanding tub installation often needs floor adjustments to get this right.

If the drain is even slightly off, water flow suffers. Worse, you may need to break the floor later. It is like placing a puzzle piece in the wrong spot. It never quite fits.

Water Supply Lines That Stay Hidden but Work Hard

Water lines feed your tub quietly. They must be placed either through the floor or wall. The choice depends on your layout and tub style.

Think of these lines like veins. You do not see them, but they keep everything alive. Poor placement leads to weak pressure or awkward pipe exposure. Good placement keeps everything smooth and invisible.

Faucet Installation Options That Shape the Look

Now comes the visible charm. Floor-mounted fillers stand tall and elegant. Wall-mounted faucets feel clean and minimal. Each option changes the room’s mood.

But here is the catch. Your plumbing must match your choice early. Switching later is not easy. Many homeowners realize this too late. And that small delay can stretch your timeline. Curious how to avoid that? Proper planning solves it.

Flooring and Structural Requirements That Keep You Safe

A freestanding tub is heavy. Fill it with water, add a person, and the weight increases fast. Your floor must handle this load.

The freestanding bathtub installation needs strong subfloor support. Wood floors may need reinforcement. Concrete slabs usually hold well.

Think of your floor like a stage. It must support the performance without creaking. Ignoring this can lead to cracks or uneven surfaces over time.

Installation Process Overview Made Simple

The process feels complex, but it follows a clear path. First comes planning. Then plumbing adjustments. Next, floor preparation. Finally, tub placement and sealing.

Each step builds on the last. Skip one, and problems show up later. It is like stacking blocks. If the base is weak, everything above shifts.

This is where professional guidance helps. Design, sourcing, and installation must work together, not in isolation.

What Does It Cost to Install a Freestanding Tub?

The cost to install freestanding tub depends on many factors. Plumbing changes, flooring upgrades, and tub type all play a role.

Simple installations cost less. Complex ones with layout changes cost more. But here is a smart tip. Spending on proper setup saves money later. Fixing mistakes always costs more than doing it right the first time.

Budget wisely. Think long-term.

Common Installation Mistakes You Can Easily Avoid

Mistakes often start with assumptions. Thinking the floor can handle the weight. Assuming plumbing will align. Ignoring clearance.

These small oversights grow into big issues. Water leaks, poor drainage, or awkward spacing can ruin the experience.

The biggest mistake? Not asking for expert help early. A guided plan saves time, money, and stress. It keeps your project smooth from start to finish.

Parting Words

A freestanding tub is more than a design choice. It is a careful balance of space, plumbing, and structure. When each detail is handled right, the result feels effortless and lasting. When ignored, problems follow quietly but persist.

We at Half Price Baths deliver custom installs, fast turnaround, and high satisfaction, all at half the price.

FAQs

1. Do freestanding tubs need special plumbing?
Yes. They often require floor-based plumbing or adjusted wall lines to support the tub’s position and design.

2. Can you install a freestanding tub anywhere?
Not always. You need proper floor support, drainage access, and enough space for clearance and maintenance.

3. How much space is ideal around a freestanding tub?
At least six inches on all sides is recommended. More space improves comfort and cleaning access.

4. Is floor reinforcement always required?
Not always. It depends on your home structure. Older homes may need added support for safety.

5. How long does installation take?
Most installations take a few days. Complex plumbing or structural changes can extend the timeline slightly.