bathroom faucets installation in Austin

Best Bathroom Faucets for Modern Renovations: Sleek Designs That Transform Your Space!

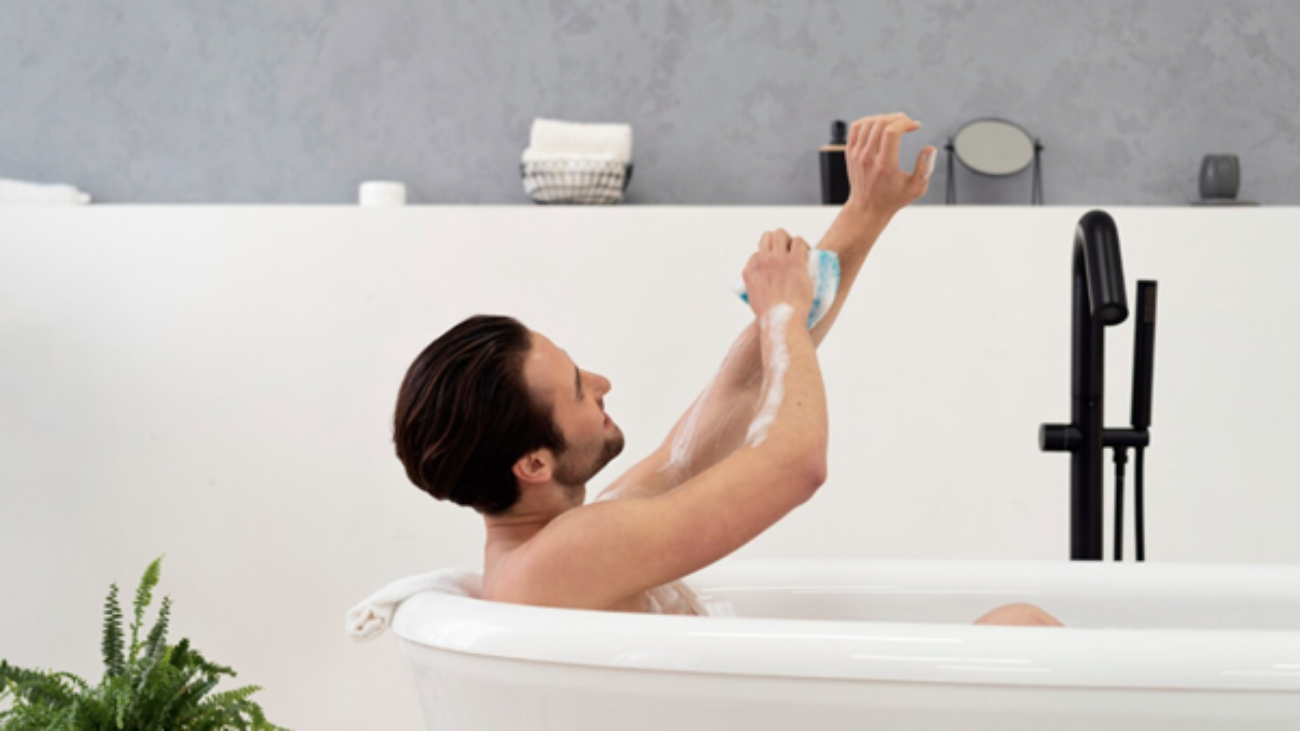
You might assume that swapping out an old faucet is a quick, unimportant fix. But in reality, a faucet is the silent star of your bathroom — and bathroom faucets installation in Austin (yes, even if you’re elsewhere, the idea holds) can change the entire feel of your space! With the right design, you do more than just refresh plumbing: you bring modern flair, elegance, and function into your daily routine.

Why Modern Faucets Matter — Not Just Function, But Form and Feel

Many people think faucets are only about water flow. That’s a misconception. The truth is: a sleek tap can make your sink, countertop, tile, and even lighting feel intentional and cohesive. In 2024–2025, about 54 percent of homeowners undertook renovation work, and bathrooms remain among the top‑renovated rooms.  

So when you are talking about bathroom faucets installation in Austin, you need to pick the style that suits your needs the most, from a cohesive one to one with a fresh vibe!

Which Faucet Style Matches Your Modern Bathroom?

  • Wall‑Mounted Faucets: Minimalism at Its Best
     Want a clean, uncluttered sink area? A wall-mounted faucet keeps the sink’s rim and countertop clear. This works beautifully with floating vanities, slim stone counters, or sculptural sinks. The water seems to float — giving a subtle spa‑like feel. Especially if your tiles or wall finish is a feature, a wall‑mounted faucet lets it shine.
  • Single‑Handle Faucets: Easy Control, Clean Lines
     Single‑handle faucets bring simplicity and sleekness. With one lever you control water flow and temperature. That focus on minimal controls pairs naturally with modern sinks or under‑mount basins. It also means easier maintenance — fewer parts, less cleaning trouble.
  • Waterfall and Vessel‑Style Faucets: Drama Meets Elegance
     Waterfall faucets pour water gently, like a miniature cascade, and look graceful on vessel sinks or sculpted countertops. If your renovation focuses on aesthetic impact — maybe a dramatic vessel sink atop marble or quartz, this type of faucet elevates the whole setting.

How These Faucets Complement Sinks, Counters, Tiles?

  • A wall‑mounted faucet + floating vanity + large-format tiles = a clean, open look.
  • A single‑handle faucet + under-mount sink + sleek countertop = minimalist elegance.
  • A waterfall faucet + vessel sink on natural‑stone counter + mosaic tile backsplash = a statement design.

Installer Tips for Maximum Visual Impact

  • Placement matters: For wall‑mounted faucets, ensure pipes are correctly aligned behind the wall — not easy DIY.
  • Proportions matter: Match faucet height and spout reach with sink depth and shape. Water should land softly, not splash.
  • Finish coordination: Choose faucet finish (matte black, brushed nickel, polished chrome) to complement tile, hardware, and lighting.
  • Tile and grout sensibility: With modern faucets, tile often becomes focal — large-format tile + minimal grout lines pair especially well.


These are some of the key tips to be used when one is talking about bathroom faucets installation in Austin in the long run.

Case Snippet: From Old Tub to Trendy Bathroom Makeover

A recent client had a tired bathroom with a standard sink and dated fixtures. We replaced the vanity with a floating wood‑grain model, installed quartz countertop and large-format slate-style tiles, and added a wall‑mounted matte black faucet.

The result: a contemporary, airy feel that transformed a drab bath into a stylish, spa‑like retreat. That one faucet upgrade gave the whole space a modern personality, and the homeowners were thrilled.

When Faucet Choice Meets Smart Budgeting?

According to a 2025 survey of homeowners, bathrooms remain among the top renovation priorities alongside kitchens.
 But even with smart design, you’ll want to know about bathroom faucet installation cost and how it fits in your budget. Picking the right faucet and combining it with thoughtful materials, without overdoing cabinetry, fixtures, or plumbing reroutes — offers high impact without over‑spending.

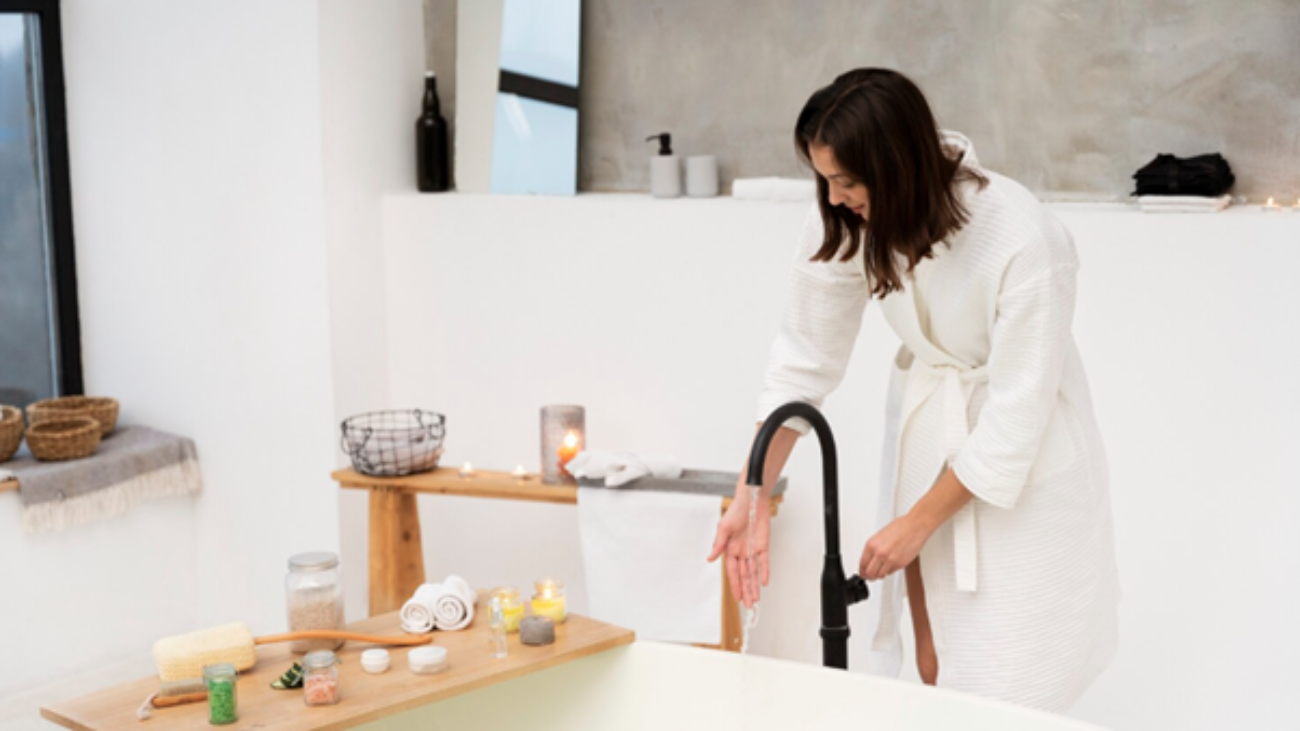
And yes, if you ever considered bathtub faucets Austin, many modern faucet lines offer matching tub/shower faucet sets that reflect the same sleek style.

By choosing thoughtfully, you step into the world of elegant, functional bathrooms — without overspending.

Why Working with Professionals Makes a Difference?

With most homeowners hiring pros for remodels (84 percent in 2025 bathroom projects) choosing professionals means your faucet is not just stylish — it’s installed precisely, aligned perfectly, and integrated with drains, tile, and wall finishes properly. That’s where a service like Half Price Baths matters: offering a “half the price” promise, quick turnaround, custom design sourcing, and high satisfaction. You get a modern bathroom — not just a faucet!

Curious What’s Best for Your Bathroom?

If you want to elevate your bath with modern faucet design, think about how your sink, countertop, tiles, and lighting all work together. The right faucet can turn a routine bathroom into a calm, modern retreat.

Final Thoughts

Choosing a modern faucet style — wall‑mounted, single‑handle, or waterfall, is more than detail-related work. It defines your bathroom’s look, feel, and mood. When combined with thoughtfully selected sinks, counters, tiles, and professional installation, the transformation is remarkable. If you aim for a renovation that feels fresh, modern, and well‑put‑together — a faucet upgrade is a small change with big impact.

With the holiday season up and about – wishing that you get the desired remodeling with us! 

Frequently Asked Questions

Q: What makes a faucet “modern” for a bathroom renovation?
 A modern faucet has clean lines, minimal hardware, and often a unique finish. It integrates smoothly with contemporary sinks, countertops, and tile to deliver a cohesive, stylish look.

Q: Are wall‑mounted faucets hard to install compared to standard ones?
 Yes, they are more complex. Wall‑mounted faucets require proper plumbing behind the wall and precise placement. Hiring a professional ensures alignment, leak‑proof installation, and a neat final look.

Q: Will a waterfall faucet work with a standard sink?
 Not ideally. Waterfall faucets pair best with vessel or under‑mount sinks. Standard sinks may cause splashing or water spread if faucet height and spout reach are not matched carefully.

Q: How much should I budget for a faucet upgrade in a bathroom renovation?
 Faucet cost varies widely — basic modern models may be affordable, premium designs or wall‑mounted units add more. Factor installation, plumbing adjustments, and matching finishes. It’s wise to add 10–20 percent cushion for quality work.

Q: Can faucet replacement alone modernize my bathroom without full remodel?
 Yes. A stylish faucet paired with updated sink, countertop or tile, even without full renovation, can refresh the bathroom’s appearance substantially. Even small changes can deliver a modern upgrade.

cost to install stand alone tub

Transform Your Countryside Bathroom: The Ultimate Guide to Installing a Standalone Tub!

If you ever imagine quiet mornings in a countryside home, feeling the soft glow of dawn through a window, and pictured yourself sinking into a warm bath — this guide is for you! In this post, you’ll discover how to go about installing stand alone tub in your rural bathroom. From planning and plumbing to style and comfort, you’ll learn step by step how to transform your space into a cozy retreat.

Why a Standalone Tub Suits Your Countryside Bathroom?

Installing stand alone tub to a rural home does more than beautify a bathroom. It brings a spa-like feel, offers a restful soak after a day’s work, and adds value to your property. Many homeowners today are turning their bathrooms into wellness and comfort zones: a survey showed that among recent bathroom remodels, 36% included bathing upgrades like soaking tubs or spa baths.

If you want a peaceful soak under wooden beams or a loft-style ceiling, a standalone tub gives you the flexibility to place the tub wherever it fits best — not just against a wall.

What to Watch Out for: Common Rural Bathroom Challenges

Rural homes often come with quirks — older structures, outdated plumbing, thinner floorboards, and limited space. Before leaping into stand alone tub installation, you should consider:

  • Whether your floor can support the tub filled with water and a bather;
  • If your plumbing setup can handle the drain and water supply;
  • Whether there’s enough ventilation to avoid mold (especially with wooden walls or older windows);
  • How the style of your tub will match rustic walls, beams, tiles, or exposed stone.

Skipping these checks can lead to water damage, sagging floors, or leaks — not the peaceful soak you envisioned.

How to Plan & Prepare: Step‑by‑Step Guide to Installing Standalone Tub

  1. Evaluate Floor Strength and Reinforcement
    If your bathroom sits on older joists or wooden flooring, have a contractor check its load-bearing capacity. To avoid sagging or structural stress, you may need to add extra joists or a plywood layer beneath the tub area.
  2. Check Plumbing and Drainage Access
    Rural bathrooms may lack modern plumbing. Ensure you have proper drainage, vent piping, and water supply lines. You might need to reroute pipes, especially if the tub isn’t going against a wall.
  3. Choose the Right Tub Style and Material
    Not all tubs suit a rustic home. A freestanding flat‑bottom tub or a vintage‑style clawfoot tub typically works best. Acrylic tubs offer lighter weight and easier installation. Heavier cast‑iron tubs give old‑world charm — but demand stronger floor support. According to recent data, freestanding tubs remain the most popular upgrade among renovators.
  4. Factor in Ventilation and Moisture Control
    Install an exhaust fan or ensure a window nearby to manage humidity. In damp rural climates, wood walls can warp or mold — so good ventilation is essential.
  5. Account for Installation Costs and Structure Upgrades
    You must budget not only for the tub, but also floor reinforcement, plumbing rerouting, ventilation, finishing, and professional labor. This overall package often determines the cost to install stand alone tub.
  6. Work with Professionals for Best Results
    Even if you love DIY, hiring pros ensures proper reinforcement, waterproofing, and compliance with building codes — especially helpful in rustic houses where surprises are common. Our team at Half Price Baths are here for you, to assist you in installing stand alone tub at your home.

How to Make the Tub Look and Feel Perfect in a Country Setting?

  • Match the tub with wood or stone finishes to keep rustic charm.
  • Use warm bulbs and soft towels to create a relaxing atmosphere.
  • Add vintage-style fixtures — like bronze faucets or wooden stool — for a cozy, natural vibe.
  • Include nonslip mats and grab bars if users are older or mobility is limited.

Customer Story — Real Transformation

“After we decided to go for a standalone tub, the team walked us through reinforcing the floor and rerouting pipes. Once the tub was in place, it felt like a little countryside spa. My evening soak in that tub melts away the stress of the day. It was worth every penny.”

This homeowner now enjoys a bathroom that feels like a serene retreat — even in a simple, rural setting.

Why You Should Consider Professional Help — Especially from Half Price Baths!

If you want your dream bath without the headache, a professional service like Half Price Baths can handle everything. We offer a “half the price” promise, quick turnaround, tailored design, and high satisfaction. With expert guidance, you avoid structural mistakes, plumbing issues, and poor aesthetics.

Final Thoughts

If you want a peaceful retreat right in your countryside home, installing a standalone tub can turn an ordinary bathroom into a cozy soak sanctuary. With thoughtful planning, structural checks, and good design, you get comfort, aesthetics, and long‑lasting value — without needless complexity.

Want help designing your bath, sourcing materials or scheduling installation? Reach out — let’s create your countryside haven together.

Frequently Asked Questions

  1. Will my old wooden floor hold a full standalone tub?
    Answer: You’ll need a structural inspection. Often, adding extra joists or plywood underlay ensures the floor supports the extra weight safely.
  2. Does installing a standalone tub require major plumbing work?
    Answer: It depends. If the drain and water pipes are nearby, minimal work is needed. Otherwise, rerouting pipes may be required — and professionals should handle that.
  3. What styles of tubs suit a rustic countryside home?
    Answer: Freestanding flat‑bottom or clawfoot tubs often match rustic interiors best. Acrylic tubs are light and easy to install; cast‑iron tubs give vintage charm but require stronger floor support.
  4. Is it expensive to get everything done (tub, floor, plumbing, finish)?
    Answer: It can be, especially with floor reinforcement and plumbing updates. That’s why budgeting for the entire project — not just the tub — is essential.
  5. How can I keep the bathroom mold‑free after installation?
    Answer: Ensure proper ventilation — an exhaust fan or regular window airing — plus waterproof finishes, and maintenance of grout and caulking.
best walk in tub shower combination

Framed vs. Frameless Walk-In Showers: Which Design Elevates Your Bathroom the Most?

You want the best walk in tub shower combination — a design that feels modern, opens up your space, and still works perfectly for everyday use? Choosing between a framed walk in shower and a frameless walk‑in shower might look trivial, but it often shapes the entire look and feel of your bathroom. This post helps you decide which style fits your layout, lifestyle, and long-term comfort.

Why does shower style matter to your bathroom’s vibe?

What you choose — framed or frameless, affects how open and spacious your bathroom feels. A well-designed shower enclosure can make the space appear airy, bright, and welcoming. A framed shower often feels more defined and structured. A frameless design gives a seamless, “room‑as-one” look that many modern homeowners love. Your choice sets the tone for the whole bathroom.

What exactly separates framed and frameless showers?

Feature Framed Walk‑In Shower Frameless Walk‑In Shower

Structure

 Metal frame holds glass panels

Glass panels with minimal hardware or hinges

Visual effect

Defined, grid‑style look that adds character

Smooth, open, minimalist look that maximizes light & space

Installation

Often pre-cut standard sizes

Custom fitting, thicker tempered glass

Cost (approx by USA standards)

$700–$1,400

$1,500–$3,200 (custom & premium setups more expensive)

Best For

Traditional, industrial or compact bathrooms

Modern, spacious or light‑focused bathrooms

What are the visual and functional gains with each?

  • Framed walk in shower add visible structure; the metal frames (often in black or metallic finish) give your bathroom a classic or industrial flair.
  • Frameless showers open up sightlines. According to experts, frameless glass “lets in more light” and “makes the room feel larger” — ideal if you want a sleek, airy vibe.

How easy are they to maintain and how long do they last?

Framed Showers –
 • Pros: The structure offers stability and often better sealing since frames can help keep water from splashing out.

Frameless Showers – 

  • Pros: No metal edges means fewer spots for mold or mineral build-up. Cleaning is easier — a quick squeegee does the trick.

Which design suits your space and budget best?

If you have a tight budget or prefer a vintage or industrial vibe, a framed walk in shower might deliver great value. If you prioritise modern aesthetics, want to make your bathroom look bigger, or are investing in a home for resale or rental — frameless could boost perceived value significantly. Demand for frameless designs is rising: recent market reports show frameless shower screens accounted for over 42 percent of global shower‑screen revenue in 2024.

Here’s an expert’s take:
 “As homeowners look for cleaner lines and more open bathrooms, frameless showers stand out for their minimalist appeal and easy upkeep.” — Bathroom design specialist

Still wondering whether to go frameless even if your bathroom is small? Keep reading — you might be surprised…

Where does durability and long‑term functionality stand?

A framed walk in shower is often considered sturdy because the frame supports the structure. That can mean fewer worries over long-term leaks or shifting glass. However frameless showers, with tempered safety glass and high-quality hardware, are more than durable enough. They just require accurate installation and good sealing. For homeowners aiming for a modern, maintenance‑friendly bath they (or their kids) can keep clean easily — frameless tends to win.

When should you choose framed and when to go frameless?

Choose a framed walk‑in shower if:

  • You prefer a structured, traditional or industrial look
  • You are on a budget or want a straightforward install
  • Your shower space is small or oddly shaped

Go frameless when:

  • You want a modern, spacious, hotel‑style bathroom
  • You plan to resell or rent the property — sleek bathrooms attract buyers
  • You want easier cleaning and low maintenance

But wait — there’s one more factor about hidden value…

If you work with a service provider who offers complete remodeling — from design through materials sourcing to installation — then you get more than just a shower. That firm can help guide your design, select the right materials, and execute quality work. For example, with Half Price Baths you get custom solutions at half the price, with quick turnaround and high satisfaction rate. That kind of service ensures your bathroom does not just look good now — but stays functional long term.

Curious to see how a framed versus frameless shower actually looks in different bathroom styles? Our experts can show you visual layouts — and help you pick the one that matches your home best.

Want to know which option saves you more money over five years? You might be surprised when you connect with us!

Conclusion

Both frameless and framed walk‑in showers have their strengths. Framed enclosures deliver structure, affordability, and familiar style. Frameless showers offer modern design, easier cleaning, and a more open, timeless look. Your choice depends on layout, budget, and long‑term goals.

As an experienced remodeling provider, we guide you toward the design that matches your home, lifestyle and resale hopes. Reach out to transform your bathroom today — and unlock a bathroom that feels fresh, modern and welcoming this holiday season.

FAQs

  1. Can a frameless shower work in a small bathroom?
     Yes. Frameless glass opens up sightlines and lets more light in. Even a modest bathroom can feel larger with clear glass and careful design.
  2. Does a framed shower leak more often than frameless?
     Not necessarily. Framed showers often have better sealing along edges. Frameless showers rely on precise installation and good seals. Quality workmanship reduces leak risk.
  3. Which shower style is easier to clean?
     Frameless showers are easier to clean because there are no metal tracks or frames where soap scum and grime can accumulate.
  4. Does a frameless shower add more value to my home?
     Yes. Frameless showers with modern looks, minimal hardware, and clean glass panels tend to increase appeal, especially for resale or rental.
  5. Is installation cost significantly different between the two?
     Yes. On average a framed shower costs less — between $700–$1,400. A frameless one often costs $1,500–$3,200 or more depending on customization and glass type.
kitchen renovation mistakes

7 Kitchen Layout Mistakes That Waste Space — And How You Can Fix Them!

What is the most common mistake that most homeowners make? You begin your kitchen remodel with excitement, maybe drawn by glossy images or trendy finishes. Then, when the cooking day comes, you realize the sink, stove and fridge are awkwardly spaced — too close, too far, or blocked by an island. That’s the first of many kitchen renovation mistakes to avoid!

You might think: “I just want a nice-looking kitchen.” But without proper layout planning, even stylish kitchens turn inefficient. If you ignore how people actually move around the kitchen, you end up with wasted space, frustrated cooking hours, and expensive rework.

In this post, you’ll discover the top 7 layout mistakes that kill your kitchen’s flow — and how you can easily avoid them with smart design and professional guidance.

Why Layout Matters (A Quick Reality Check)!


Recent data from the 2025 Houzz U.S. Kitchen Trends Study shows that over half of homeowners (53 percent) change their kitchen layout during a renovation. 

That tells you: many kitchens weren’t laid out optimally in the first place. If you remodel without careful planning, you might just repeat the same mistakes.

  1. Cramped Work Triangle — Sink, Stove, Fridge Too Close or Too Far?
    When your sink, stove, and refrigerator are squeezed too tightly or placed far apart, cooking becomes a hassle. You bump into counters, walk too much, or strain to reach things.

Fix: When rectifying these kitchen renovation mistakes, you must map out a proper “work triangle” so that each zone (wash, cook, store) sits at a comfortable distance, about 4 to 9 feet between each point. That ensures smooth motion and a functional workflow.

  1. No Clear Zones — Prep, Cook, and Storage All Mixed Up
    Sometimes your prep area sits next to the stove, the fridge blocks the main walkway, and storage is tucked away awkwardly. Everything gets mixed up and messy.

Fix: Divide your kitchen into distinct zones: cooking, prepping, storage, cleaning. Plan for enough counter space near the stove and sink; allocate storage where it’s needed. That way cooking, cleaning, and storing don’t fight for the same space.

  1. Awkward Traffic Flow — Islands or Cabinets Blocking Walkways
    A gorgeous island or cabinetry layout might look sleek, but if it blocks pathways or opens right into traffic zones, you get a kitchen that feels cramped the moment someone walks in. More than often, you will find many of these, and notify them as your kitchen renovation mistakes to avoid.

Fix: Keep walkways at least 36 inches wide. Plan entry and exit points so the kitchen flow works even when multiple people move around. Avoid placing islands where doors or fridge drawers swing into busy walkways.

  1. Under‑utilized Vertical Space — Wasted Storage Potential
    Many remodels focus on floor-level cabinets, leaving the vertical space above unused. You lose chances for extra storage, and your counters get cluttered.

Fix: Use full-height cabinets, overhead storage, or shelving. That way you maximize space without expanding the footprint. It keeps clutter off the counters — and ensures efficient use of every inch.

  1. Overemphasis on Looks — Ignoring Functionality
    You might fall for glossy finishes, trendy island shapes, or fancy materials, and forget that the kitchen must work first. A beautiful kitchen that doesn’t function is one costly regret.

Fix: Prioritize durable materials, ease of use, and smart layout before style. Ensure cabinets open smoothly, appliances fit without obstruction, and surfaces handle everyday wear and tear. Balance style with practicality.

  1. Skipping Professional Input — DIY Layouts Often Fail
    Thinking you can sketch a layout and wing it might save some money — but it often leads to regrets. Studies show 74 percent of homeowners regret major renovation decisions within two years.

Fix: Consult professionals for layout planning, material sourcing, and installation. A good remodeler helps you foresee pitfalls — and delivers a space that looks good and works well for years.

For example, Half Price Baths offers custom design, material sourcing, fast turnaround, and a “half the price” promise — all tuned to meet your specific needs when you are looking for kitchen renovation Austin expertise.

  1. Ignoring Future Needs — Designing for Today Only
    You renovate for now — but what about when your family grows, your cooking habits change, or you need extra storage? Designing only for the present is one of the kitchen renovation mistakes, that can make the kitchen obsolete sooner than you expect.

Fix: Think long-term: plan for flexibility, possible storage expansion, easy cleaning, and comfortable movement. Build with a mindset that your kitchen should evolve with your life.

Two Thoughts You Might Have Now!

  • Will these changes really make a difference in daily life? Yes — a properly designed kitchen layout saves time, reduces frustration, and makes cooking enjoyable.
  • Is investing time and a bit more money upfront worth it? Absolutely — because avoiding layout mistakes often prevents expensive rework.

Wrapping Up: Your Kitchen Can Be Functional, Spacious, and Beautiful


When talking about kitchen renovation mistakes to avoid, does not mean sacrificing design. It means planning wisely. By focusing on proper layout, clear zones, vertical storage, efficient traffic flow, and future‑ready design, you create a kitchen that feels right, works great, and lasts.

If you want help with tailored layout planning, design guidance, materials, or installation — let’s talk. Your dream kitchen might be just one good plan away.

FAQs

Q: How much space do I need for the work triangle?
 A: Ideally you want about 4 to 9 feet between the sink, stove, and refrigerator. That distance keeps movement smooth without crowding or long walks.

Q: Can I combine prep, cook, and storage zones in a small kitchen?
 A: Yes — with smart planning. Use vertical storage, pull‑out drawers, and compact counter space. Define zones even in small kitchens to make them efficient.

Q: How wide should walkways be in a kitchen?
 A: Aim for at least 36 inches wide. That ensures people can move comfortably even while someone cooks or opens an appliance.

Q: Should I hire professionals or try a DIY remodel?
 A: Hiring pros often pays off. Experts help with layout planning, plumbing, electricals, materials, and installation, avoiding costly mistakes down the line.

Q: How do I plan my kitchen for future needs and changes?
 A: Opt for flexible layouts, modular storage, and easy‑to‑update materials. Design so the kitchen can adapt, whether your family grows, lifestyles change, or you sell the house later.